The retail window edit · Halloween 2026
Make your shop the one people stop for. Original visual concepts, practical build recipes and a clear way to see whether the attention turns into visits.
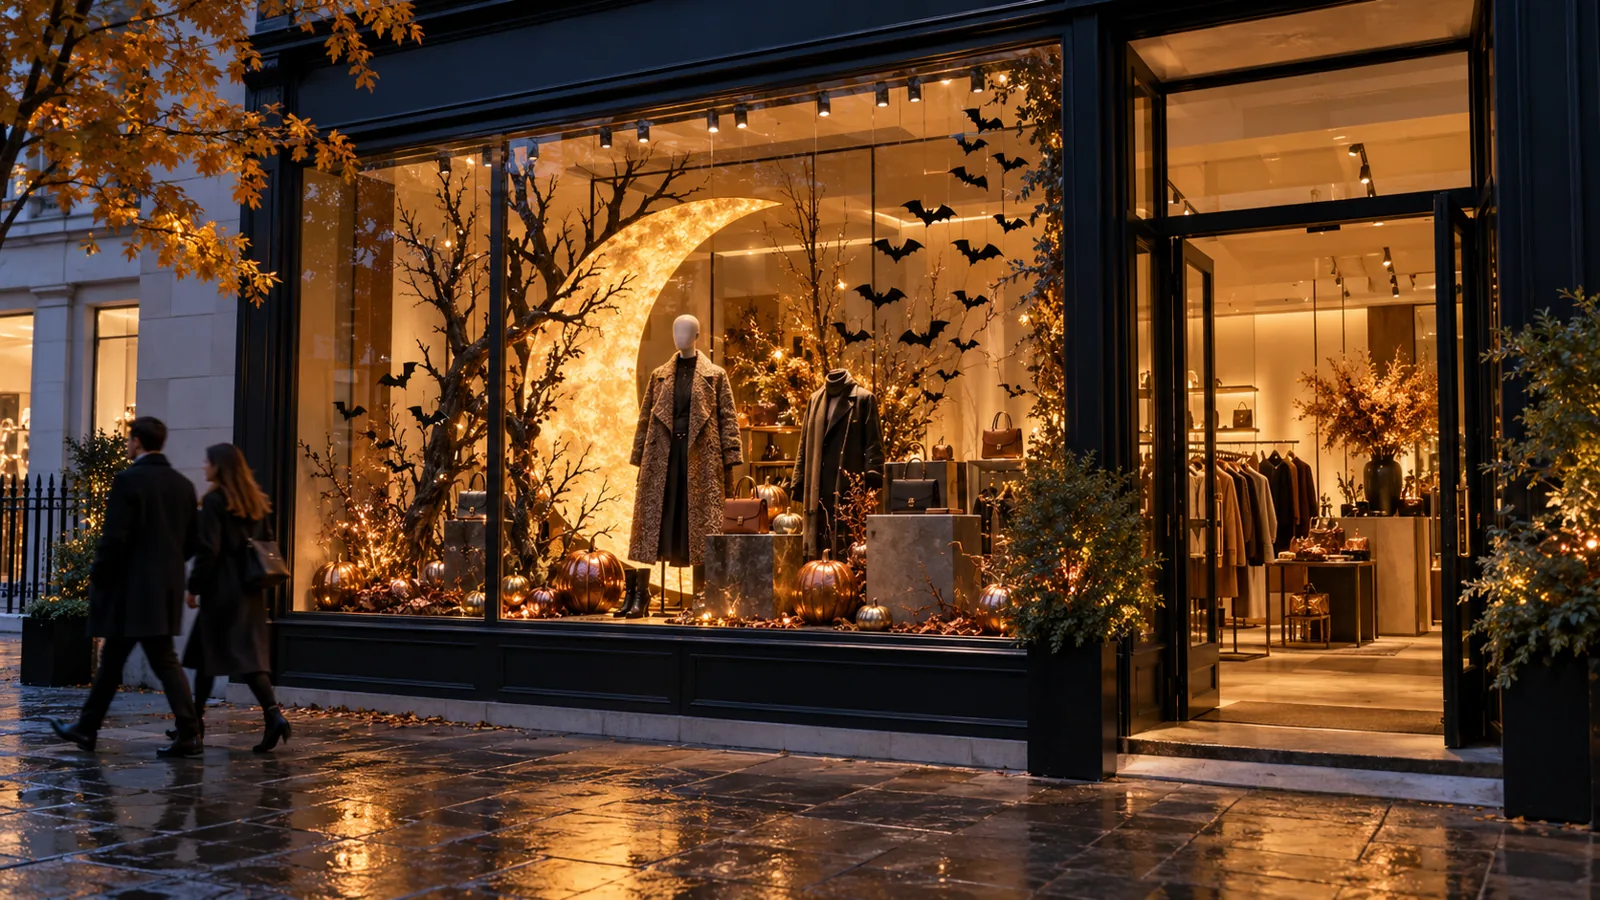
Concept visuals created by V-Count. Designs shown are ideas to adapt to your premises, not photographs of customer installations.
The strongest Halloween shop windows start with one clear idea, keep real products visible and make the next step into the store obvious. A paper moon can frame a reading nook. A skeleton can wear the outfit you want to sell. A playful monster can turn the shopfront itself into the attraction.
This guide gives you 50 Halloween window display ideas for retail stores, from quick updates for small shops to larger, theatrical installations. Every concept includes a visual, a materials list and a build recipe. Choose the one that suits your merchandise and the time your team actually has.
Building for Halloween 2026? It falls on Saturday 31 October. If you are starting in mid-October, put a complete, manageable idea in the window now. Leave yourself time to check it in daylight, after dark and during a busy trading period.
Before you buy a single pumpkin,
answer three questions.
Choose one focal product or product group. Give it a recognisable shape, enough light and breathing room.
Make the window’s product, experience or activity easy to find in the shop. Keep the doorway visible.
Pick a measure before the change: capture rate, featured-product sales or a clearly recorded interaction.
Find an idea that fits your shop.
50 of 50 ideasTime labels are planning estimates for one window with fixtures and materials ready. Budget labels are relative, not price quotes. Adapt ideas across store types.
No ideas match these filters.
Try a wider selection or add some ideas to your shortlist.
Easy Halloween window ideas for small shops
One strong shape, a few useful materials and the stock you already have. These first ten concepts put speed and clarity first.
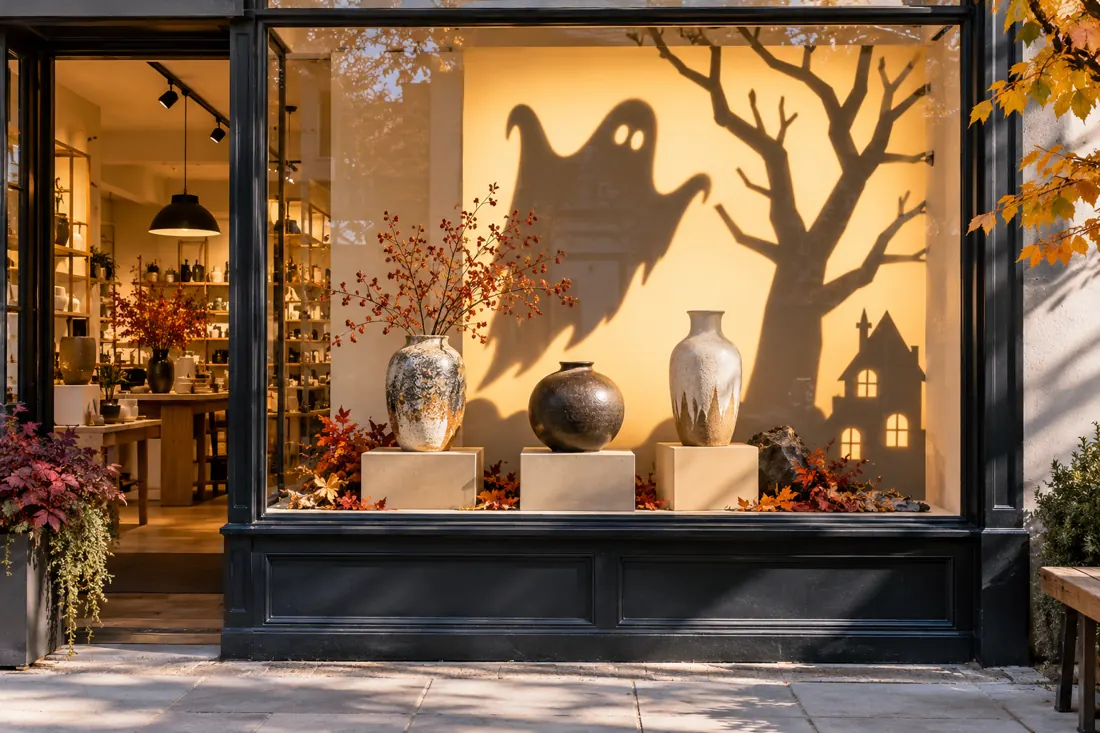
1. The Shadow-Shop Window
Turn a few familiar objects into an unfamiliar little world. The silhouettes supply the Halloween story while three real products stay bright, clear and easy to recognise. This is especially useful in a shallow window where a three-dimensional set would swallow the stock.
You will need: Black card; removable fixing tabs; pale backing paper.
Open the build recipe
- Cut one large silhouette and two smaller supporting shapes.
- Fix them behind or beside the products, leaving a clear central sightline.
- Light the merchandise from the front and check the view from both approaches.
Make it shoppableRepeat the three products together on the first shop fixture.
Avoid thisA dark background and dark products can merge into one unreadable patch.
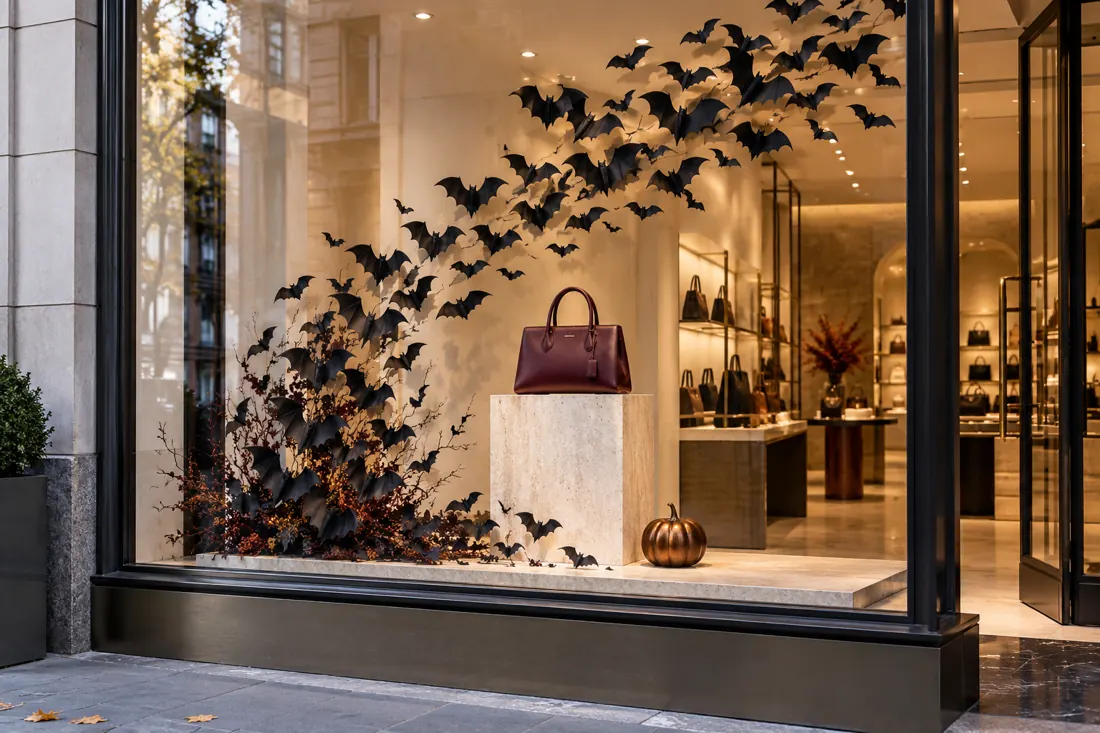
2. The Bat Flight Frame
Let a flight of bats do the pointing. A diagonal arrangement gives a static window direction and makes a single handbag, pair of boots or jewellery stand feel like the destination. The sweep matters more than the number of bats.
You will need: Black paper; reusable templates; removable tabs.
Open the build recipe
- Make three bat sizes from one simple template.
- Start loosely at one corner and tighten the group near the focal product.
- Keep the glass immediately in front of the merchandise clear.
Make it shoppableUse the same bag or accessory inside, in the same colour, so recognition is immediate.
Avoid thisA solid wall of bats competes with the product and hides the shop.
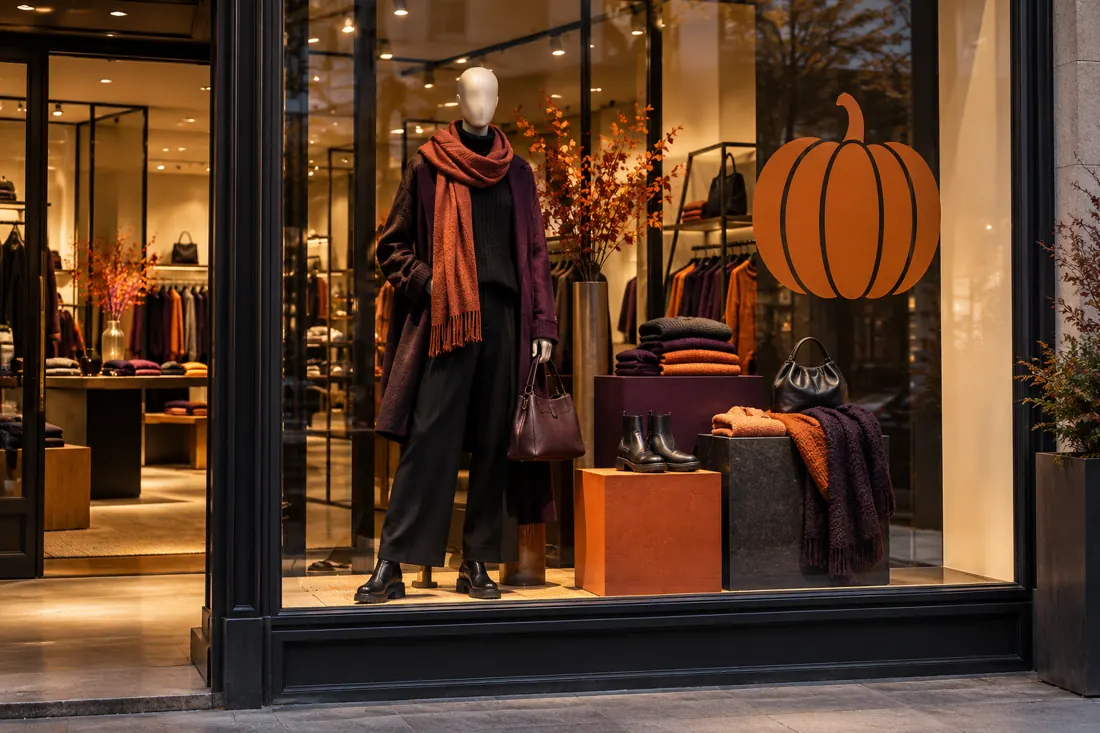
3. The Midnight Colour Edit
Make Halloween out of what you already sell. Black boots, plum knitwear and a burnt-orange bag can create a convincing seasonal window without a costume or an elaborate prop. The commercial strength is simple: the things that catch the eye are available to buy.
You will need: Existing stock; plain plinths; one small seasonal motif.
Open the build recipe
- Choose one complete look and two complementary items.
- Arrange them at different heights with a restrained backdrop.
- Add one recognisable Halloween detail and stop there.
Make it shoppableShow an accurate price for the outfit or individual pieces when you install the real display.
Avoid thisToo many shades make the edit look like clearance stock.
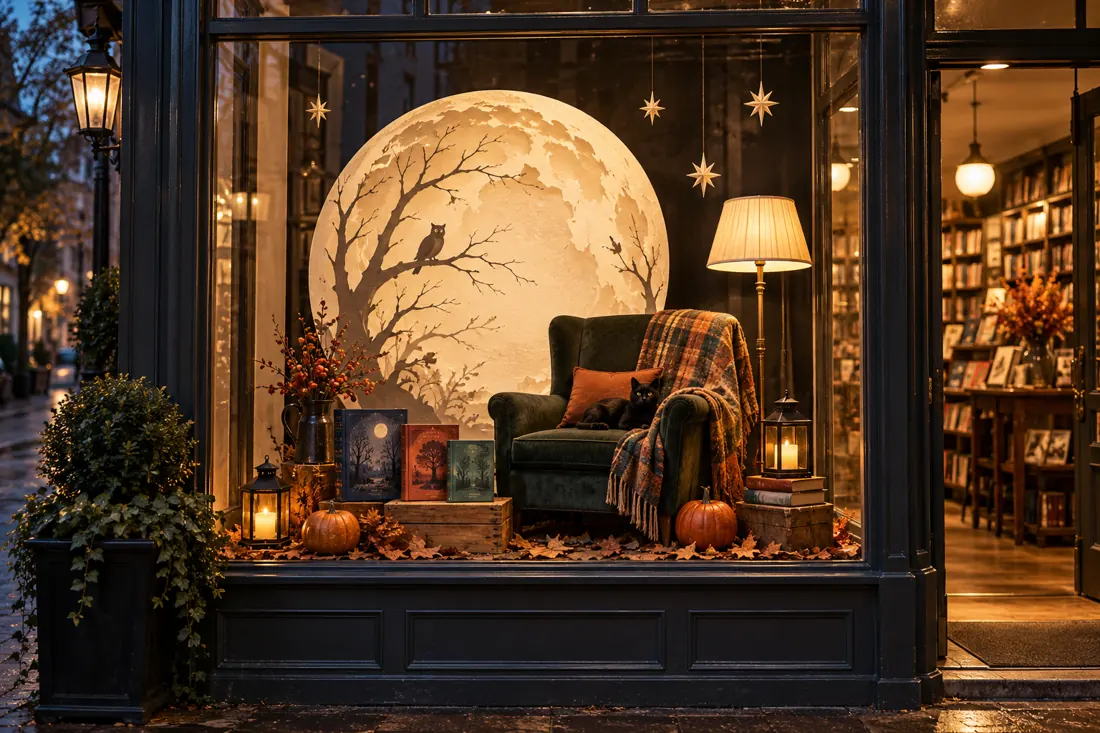
4. The Giant Paper Moon
A large moon turns an ordinary window into a night-time scene. Give it a grounded purpose: a reading corner for a bookshop, a nighttime routine for beauty, or an evening outfit for fashion. The oversized circle creates the theatre; the products tell shoppers what the shop offers.
You will need: Paper moon; existing chair or plinth; LED lamp.
Open the build recipe
- Cut a lightweight moon from card or use a reusable circular panel.
- Place the hero product in front, slightly off-centre.
- Add one warm light and a small supporting detail.
Make it shoppableFor a bookshop, keep real covers facing the pavement and the same reading selection inside.
Avoid thisDo not let the moon hide merchandise or become the only well-lit object.
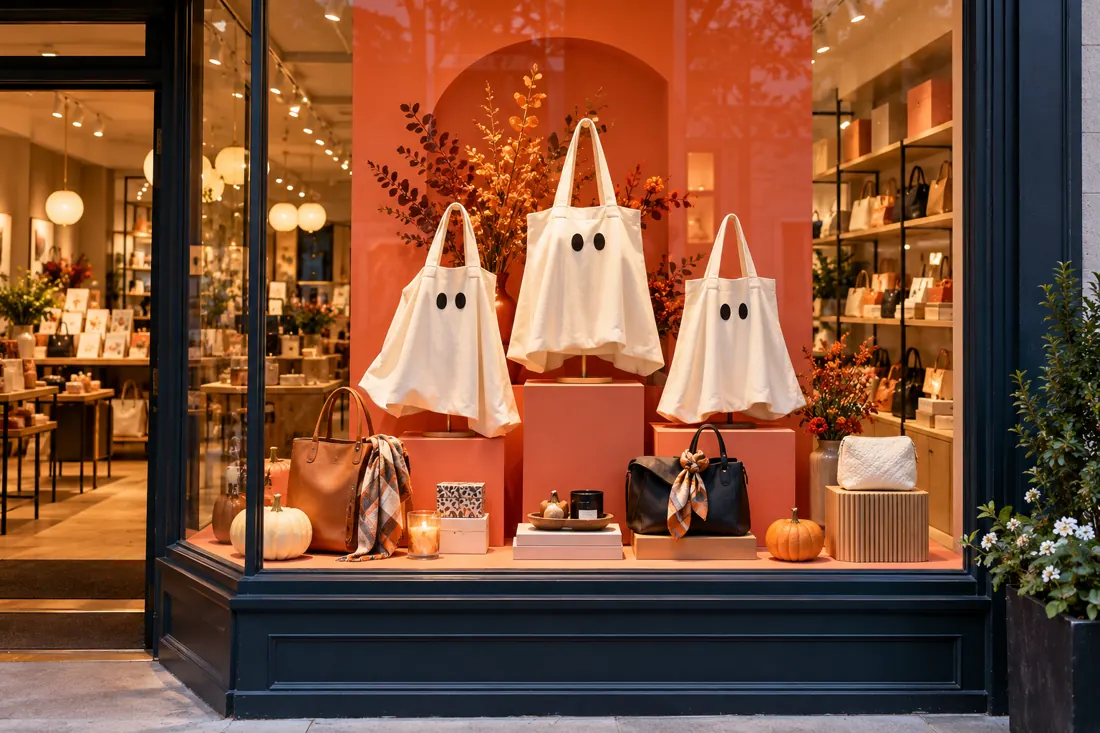
5. The Ghost-Shopping Tote
Give ordinary shopping totes a mischievous personality. Small removable eyes and a simple upright stand can turn cream bags into a friendly ghost family. It is playful enough for Halloween while keeping the actual product shape completely legible.
You will need: Canvas bags; removable felt eyes; bag stands.
Open the build recipe
- Choose three bags with different proportions.
- Attach removable eyes to display samples or protective sleeves.
- Place an unstyled bag beside the characters so the product is clear.
Make it shoppableMerchandise the normal bags and accessories together inside.
Avoid thisAvoid permanent adhesives on saleable stock.
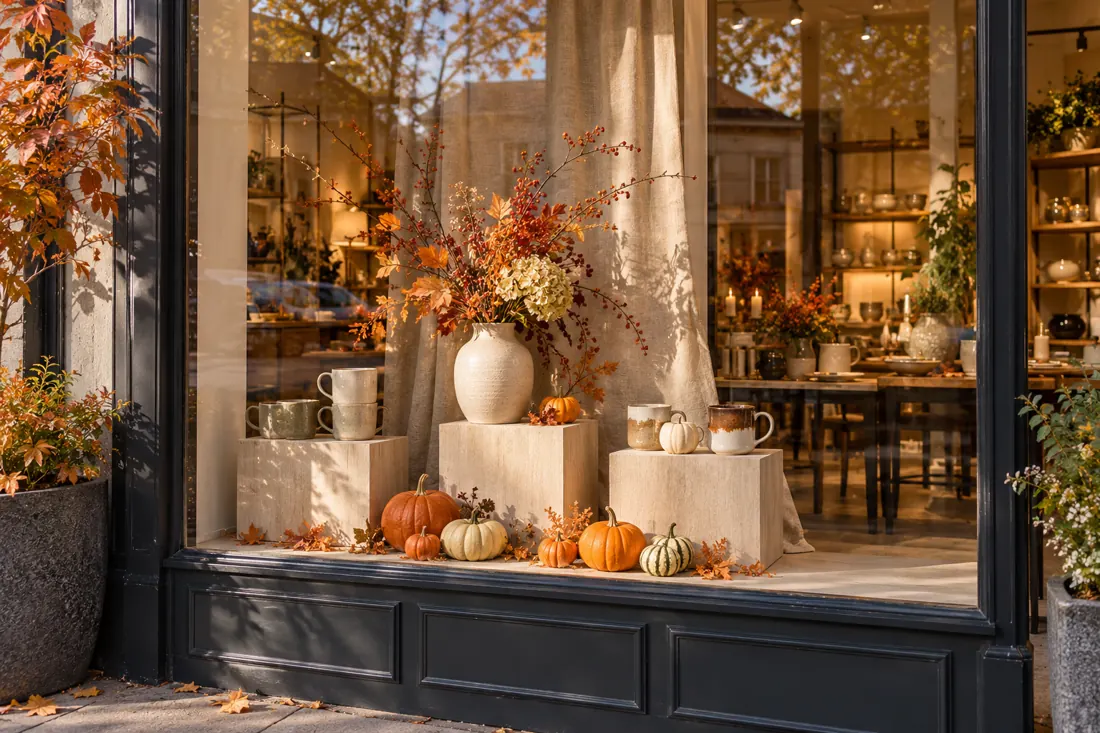
6. The Tiny Pumpkin Pedestals
Use pumpkins to give an existing product arrangement a seasonal setting. A cluster at the base creates colour and texture while mugs, ceramics or fragrance remain on proper display risers above it. This is an easy way to refresh a small window without redesigning the entire shop.
You will need: Stable risers; a few decorative pumpkins; plain cloth.
Open the build recipe
- Arrange three risers at varied heights.
- Place the most important product on the clearest level.
- Group pumpkins low and to one side, leaving open space.
Make it shoppableKeep the front product easy to remove and replace when it sells.
Avoid thisPumpkins are props, not stable supports for valuable stock.
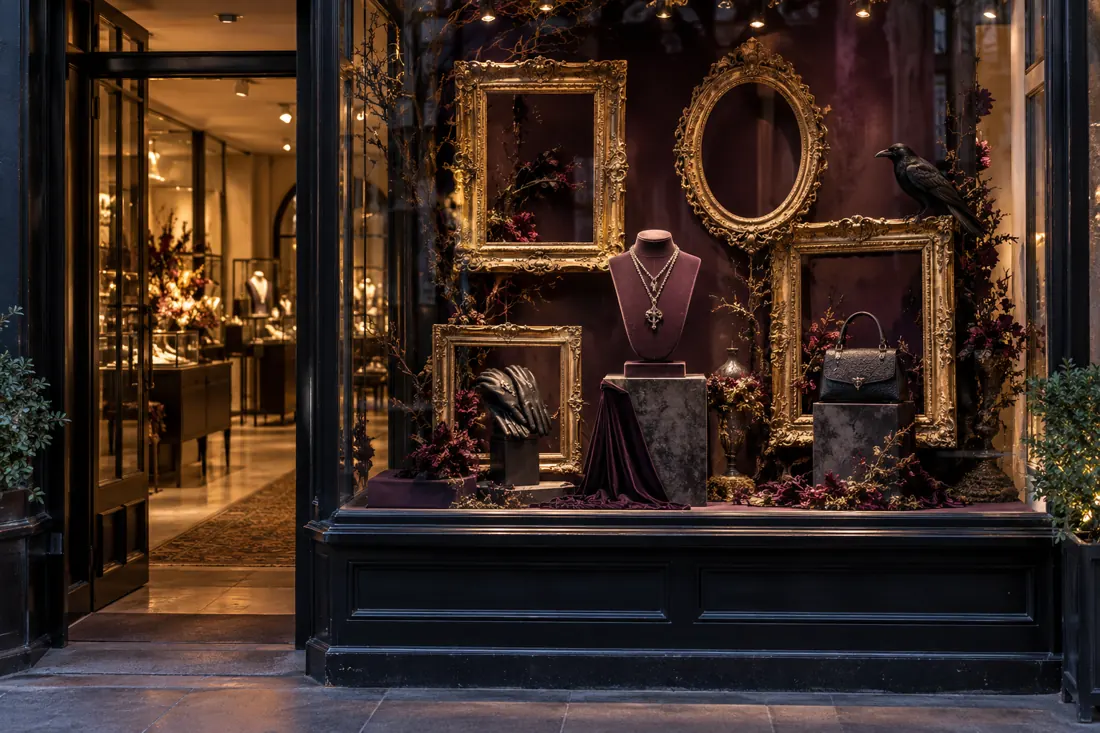
7. The Haunted Picture Frames
Give a necklace or handbag the presence of a haunted portrait. Empty frames create individual viewing moments and let small products hold their own in a larger window. A dark backing makes the frame edges visible, while precise product lighting prevents the display becoming gloomy.
You will need: Empty frames; fabric backing; jewellery stands.
Open the build recipe
- Select a small set of frames in related finishes.
- Mount them securely around, rather than in front of, product stands.
- Leave one frame larger than the others to establish a focal point.
Make it shoppableUse each frame for a small, coherent product story.
Avoid thisToo many frames turn a curated gallery into visual clutter.
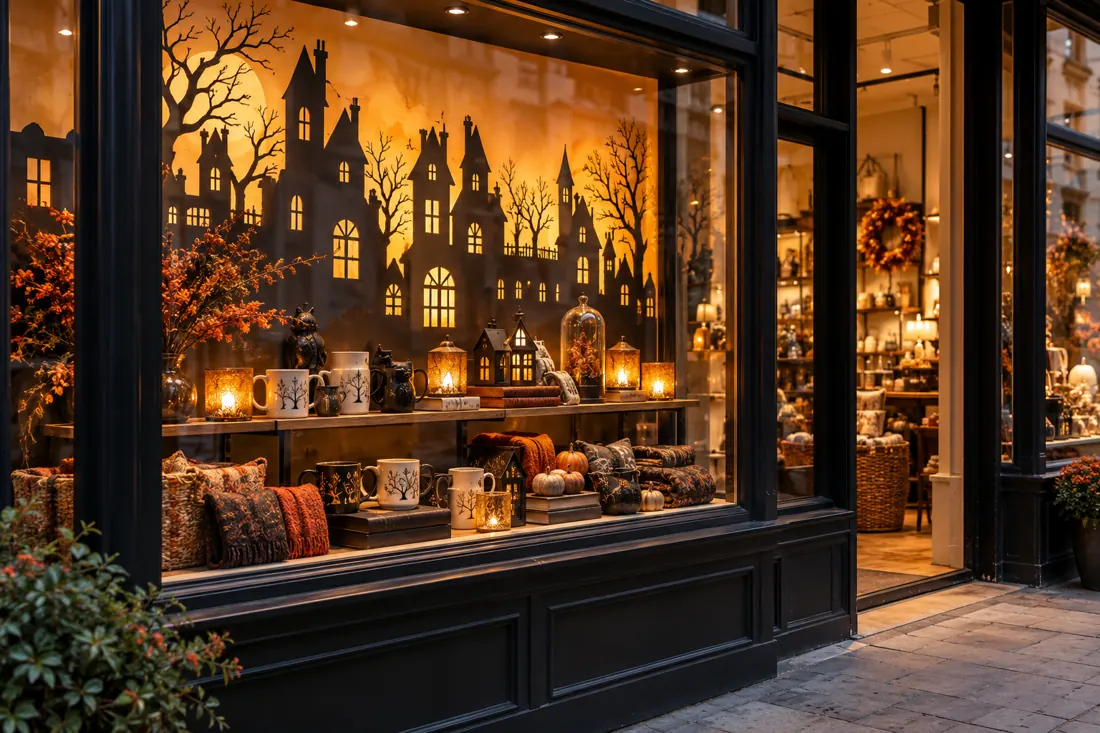
8. The Paper-Cut Skyline
A row of crooked rooftops adds depth without needing much floor space. Build the skyline as a flat backdrop and keep the real products in a clean foreground. It works well for gift shops and narrow windows where the shop interior still needs to remain visible.
You will need: Card sheets; cutting template; warm LED backlight.
Open the build recipe
- Cut a single simple skyline with generous building shapes.
- Stand it behind the product shelf on secure supports.
- Use a soft backlight and a separate light for merchandise.
Make it shoppableChoose gifts that read clearly against the silhouette rather than lots of tiny objects.
Avoid thisSmall intricate cut-outs disappear from the opposite pavement.
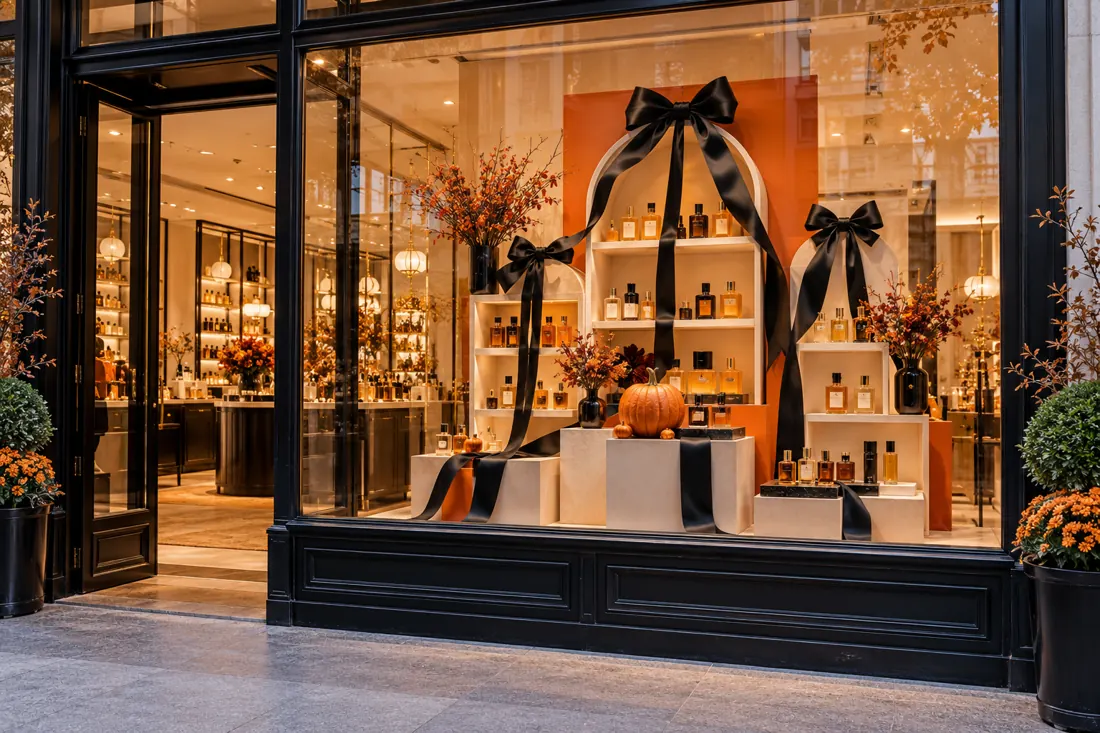
9. The Black Ribbon Product Gallery
Use ribbon to give familiar shelves a darker, more theatrical outline. A few well-placed bows and a controlled colour palette suit beauty, fragrance and accessories stores that want Halloween without changing their visual identity. The ribbon should frame the stock, not wrap it out of sight.
You will need: Black grosgrain ribbon; existing shelves; removable ties.
Open the build recipe
- Choose one ribbon width and finish.
- Tie or fix details to the display fixtures, not delicate packaging.
- Repeat the accent on the matching shelf inside the store.
Make it shoppableKeep labels and prices visible on the real installation.
Avoid thisTrailing ribbon should never reach lights, doors or walking routes.
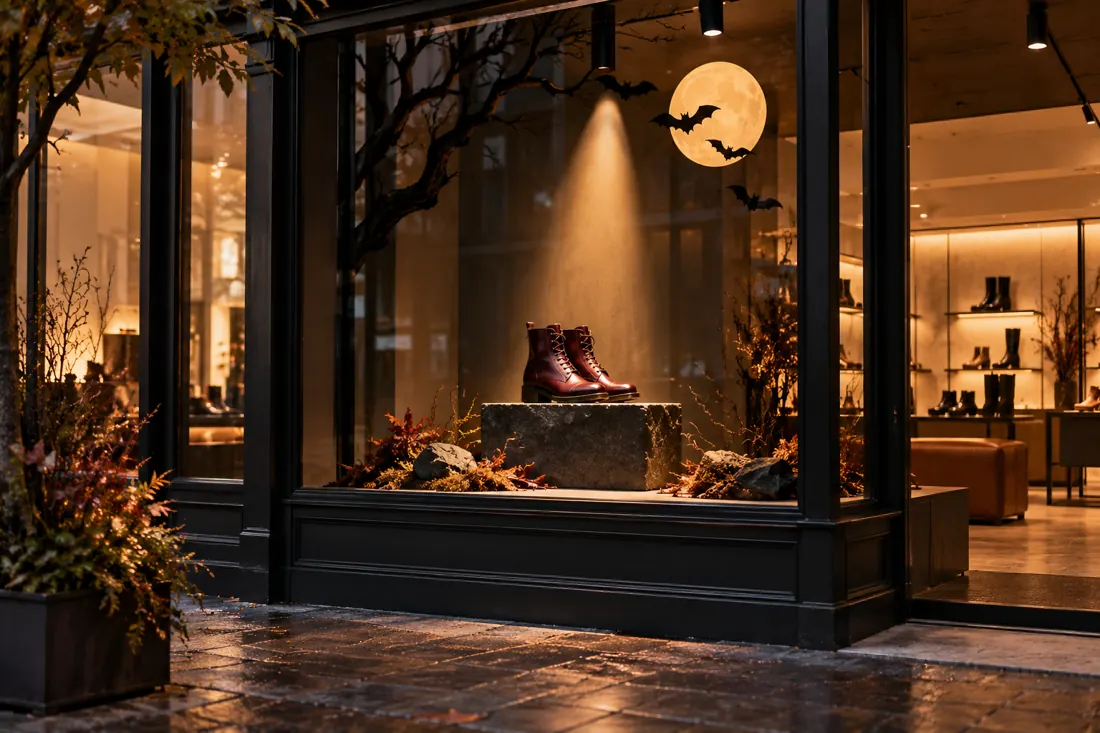
10. The After-Dark Spotlight
Build the window around the product a customer should remember. A pair of boots in a clear pool of warm light can carry the whole scene when the backdrop is quiet. Add a small Halloween silhouette to establish the season without weakening that focus.
You will need: Existing spotlight; simple plinth; dark backing.
Open the build recipe
- Remove competing props from the central sightline.
- Aim the light to reveal the product’s shape and texture.
- Check the same view during daylight and after dark.
Make it shoppableUse this for an available hero item with enough stock to support the display.
Avoid thisA moody window still needs to look open and welcoming.
Halloween displays for your kind of shop
A beauty store, a bakery and a bookshop have different things to sell. Start with your category’s natural appeal and give it a seasonal setting.
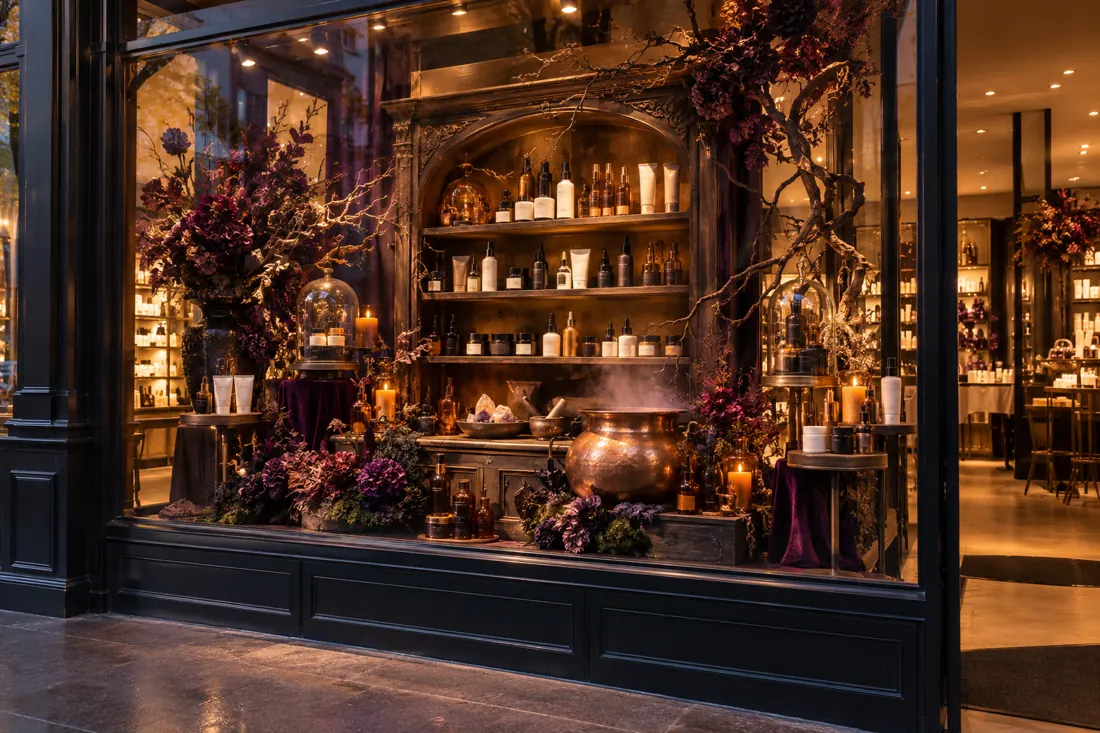
11. The Beauty Potion Bar
Turn the window into a potion bar where the ingredients are your actual beauty range. Group products by a genuine routine, such as cleanse, moisturise and fragrance. Decorative glass gives the theme atmosphere, while original packaging makes the merchandise recognisable.
You will need: Existing shelving; amber prop bottles; product stands.
Open the build recipe
- Create three clear product groups on stable shelves.
- Add a few empty decorative vessels behind the stock.
- Light the products more strongly than the props.
Make it shoppableContinue the routine at a staffed tester station inside, using the normal product instructions.
Avoid thisDo not decant saleable cosmetics into fantasy bottles or imply medicinal effects.
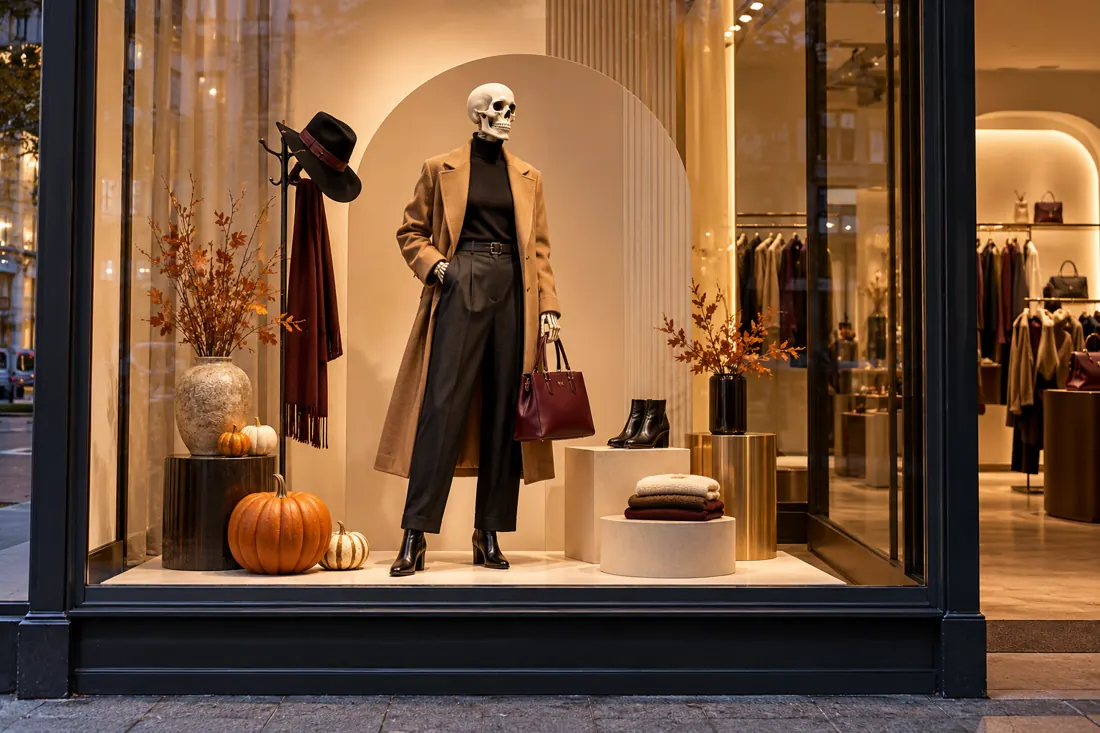
12. The Skeleton Stylist
Let the skeleton be your best-dressed customer. A good coat, boots and a bag make the visual joke work immediately, and every wearable item gives someone a reason to ask about the look. Keep the styling polished so the humour supports the shop’s positioning.
You will need: Skeleton display prop; complete outfit; hat stand.
Open the build recipe
- Secure a suitable display skeleton on a stable stand.
- Dress it in one complete, available outfit.
- Add a matching accessory near the doorway or first rail.
Make it shoppableGive staff a list of the sizes, colours and alternatives shown.
Avoid thisThe prop should not conceal fit, footwear or the outfit’s strongest detail.
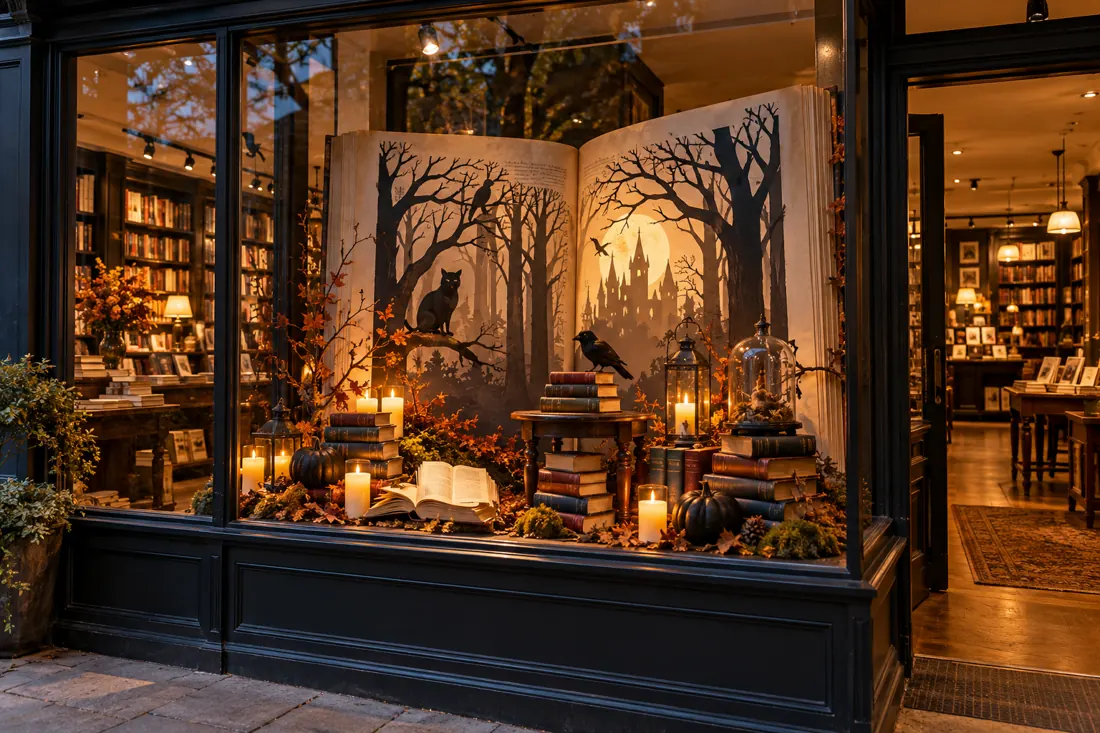
13. The Haunted Book Nook
Build a small world readers would like to step into. An oversized open-book shape makes a useful backdrop for ghost stories, autumn fiction or cosy mysteries. The most important part is the real selection at the front, where customers can see what to ask for.
You will need: Open-book backdrop; display copies; LED candle lamps.
Open the build recipe
- Make a large open-book shape from folded board.
- Layer a simple woodland or house silhouette behind the display copies.
- Add warm LED light and leave the covers unobstructed.
Make it shoppableRepeat the exact selection on a table just inside the entrance.
Avoid thisA beautiful scene with hidden covers gives readers no buying cue.
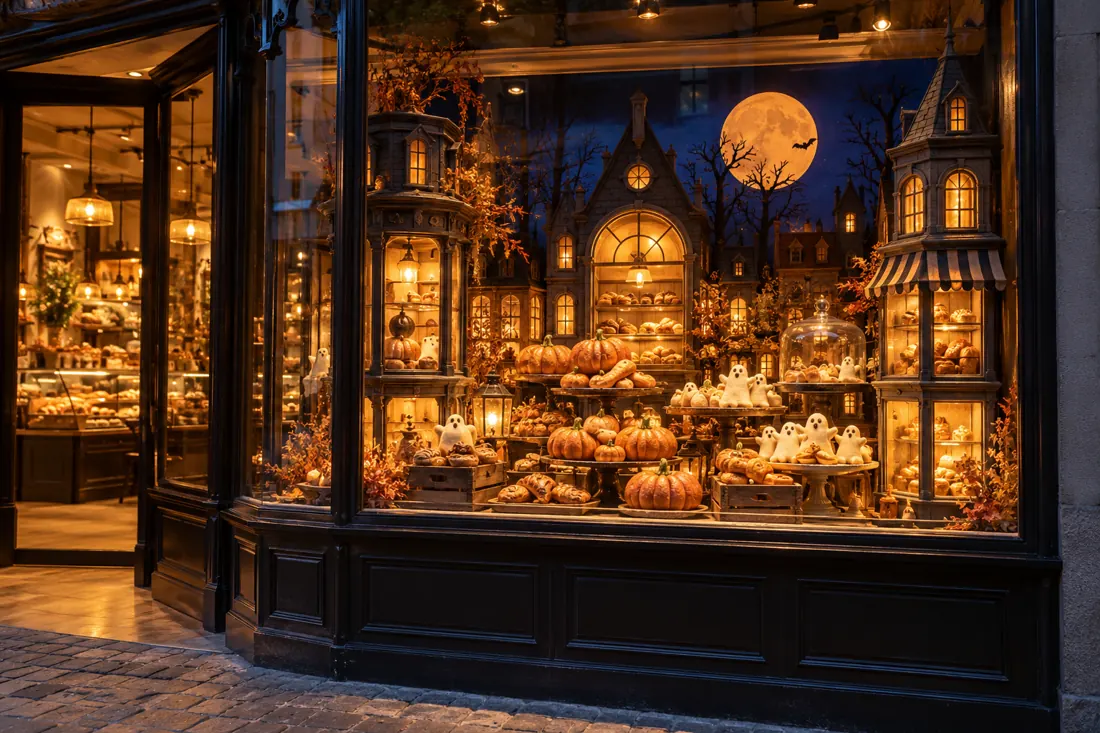
14. The Midnight Bakery
Make the bakery look like it has opened after the rest of the town has gone to sleep. Small theatrical facades frame the actual seasonal bakes. The window should communicate appetite and freshness before the visitor notices the Halloween details.
You will need: Miniature facades; food-safe display equipment; warm lights.
Open the build recipe
- Build a simple night-time street backdrop.
- Place the real seasonal range in the appropriate food display.
- Use warm light without changing the products’ natural appearance.
Make it shoppableKeep the same treats available at an obvious service point inside.
Avoid thisProps must stay separate from food, cleaning and temperature-control requirements.
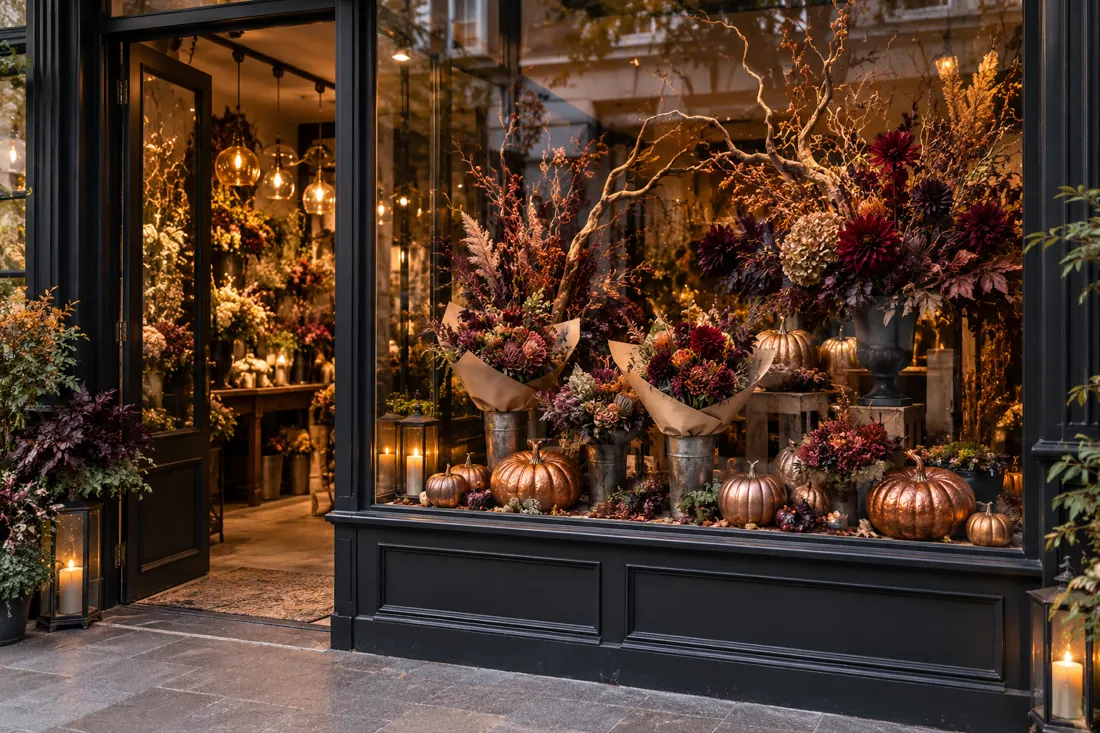
15. The Enchanted Florist
Give Halloween a floral interpretation. Burgundy blooms, sculptural branches and dark foliage can feel dramatic without using a monster or a costume. Arrange the finished bouquets at the front so the window advertises something customers can take home today.
You will need: Dark foliage; seasonal flowers; reusable vessels.
Open the build recipe
- Build one asymmetrical arrangement with a clear high point.
- Place two or three finished bouquets below it.
- Keep stems, vessels and wrapping tidy from the street view.
Make it shoppableOffer a smaller bouquet that carries the same palette.
Avoid thisA large installation needs a watering and replacement plan.
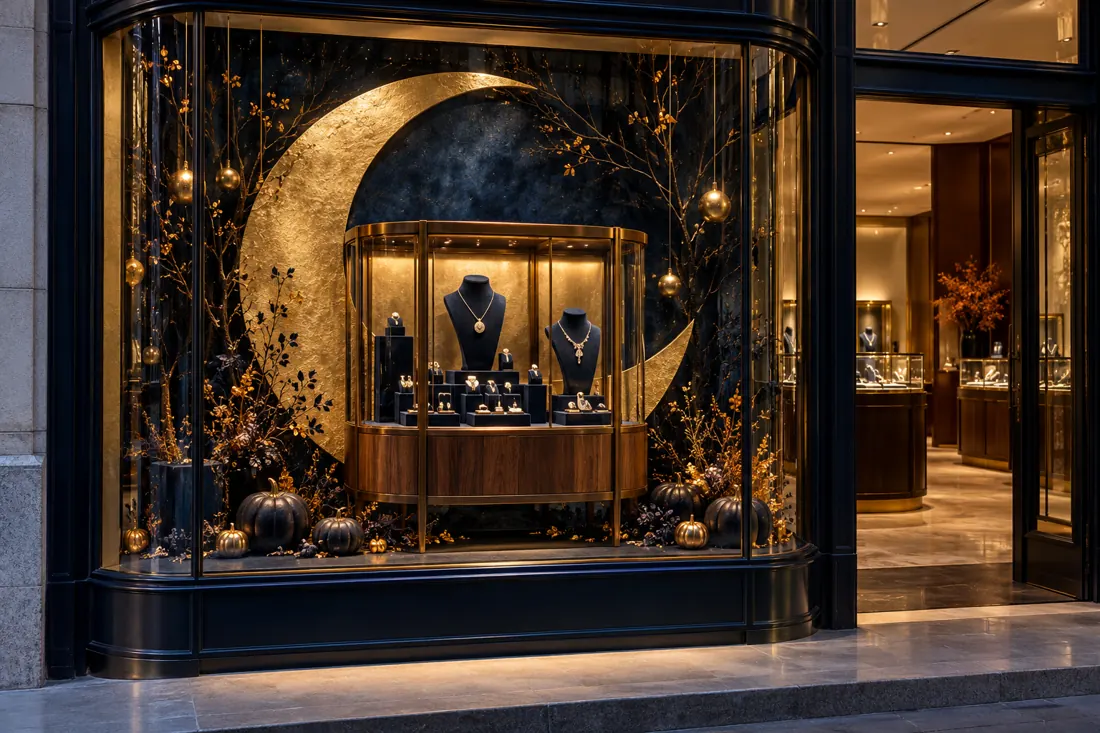
16. The Jewellery Moon Cabinet
Use a moon as a quiet frame for small, precious objects. A restrained cabinet and generous space around each piece make this a good Halloween direction for jewellery and watches. The seasonal reference stays subtle enough to fit a premium store.
You will need: Moon-shaped panel; velvet stands; focused lights.
Open the build recipe
- Install a lightweight crescent shape behind the cabinet.
- Choose a limited selection of complementary pieces.
- Aim lights to reveal each item without glare on the glass.
Make it shoppableMatch the displayed collection to a clearly identified showcase inside.
Avoid thisDo not confuse a dramatic backdrop with adequate light on the jewellery.
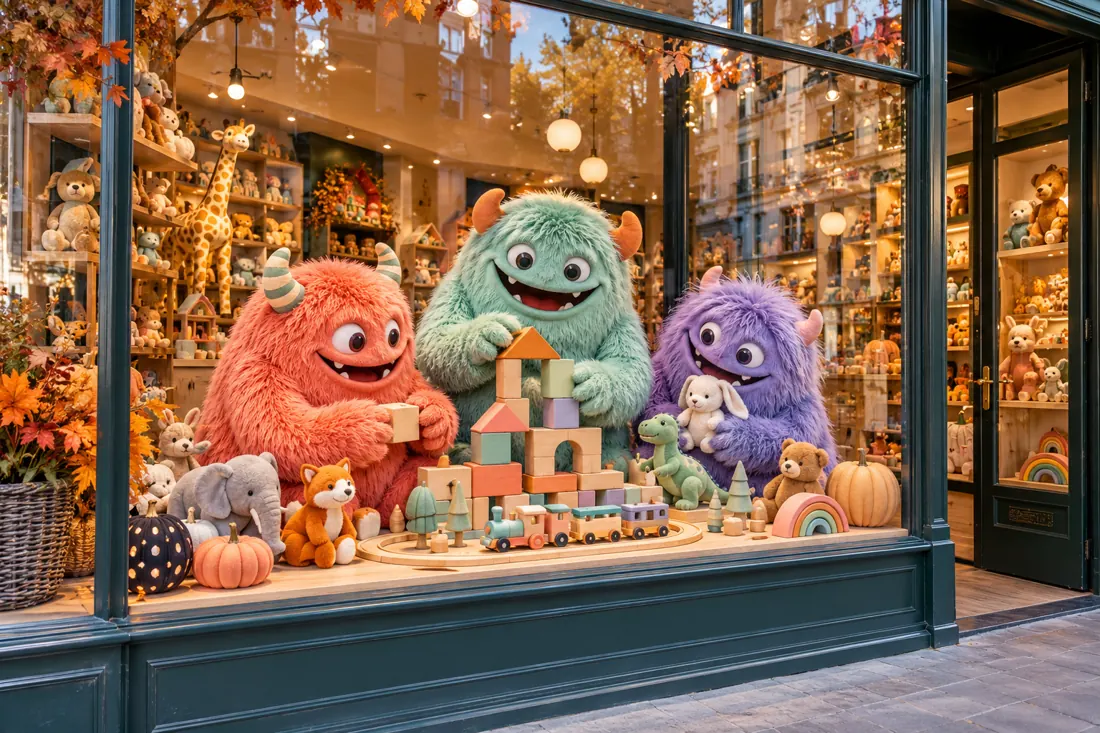
17. The Toy-Shop Monster Club
Create a club of friendly creatures that appear to be playing with the stock. Rounded shapes and warm colours make Halloween approachable for families. The toys should remain the most detailed, recognisable objects in the scene.
You will need: Soft monster props; simple platforms; featured toys.
Open the build recipe
- Choose a small cast with different shapes.
- Give each character one toy or product role.
- Keep the lowest product group visible from a child’s eye line.
Make it shoppableLet children find the same toys easily with an adult inside.
Avoid thisA crowded cast of characters can hide the actual range.
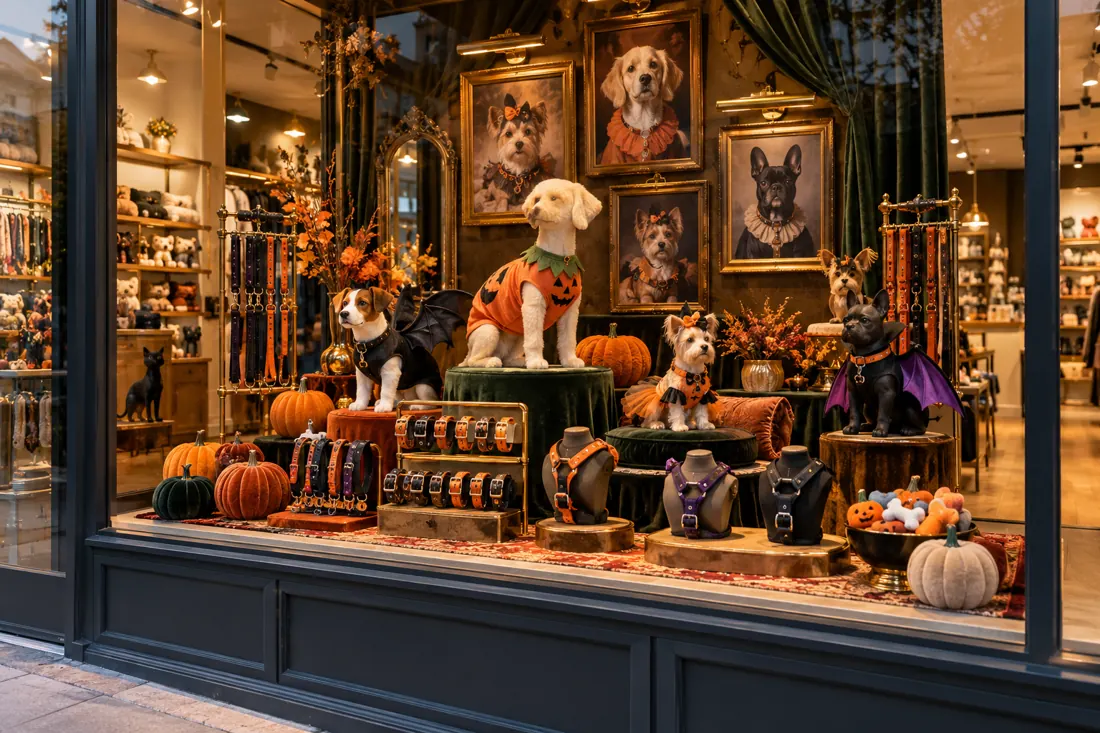
18. The Pet Costume Portrait Studio
Present pet accessories like a small portrait studio. Display forms make the sizing and shape of costumes easy to see without requiring live animals in the window. Collars, harnesses and everyday items can sit alongside the seasonal range.
You will need: Pet display forms; framed photos; costume samples.
Open the build recipe
- Use stable pet-sized display forms.
- Style each with one correctly fitted display sample.
- Arrange size and product information beside the real merchandise.
Make it shoppableMake fitting advice and the range of sizes easy to find inside.
Avoid thisDo not imply that every costume suits every animal or size.
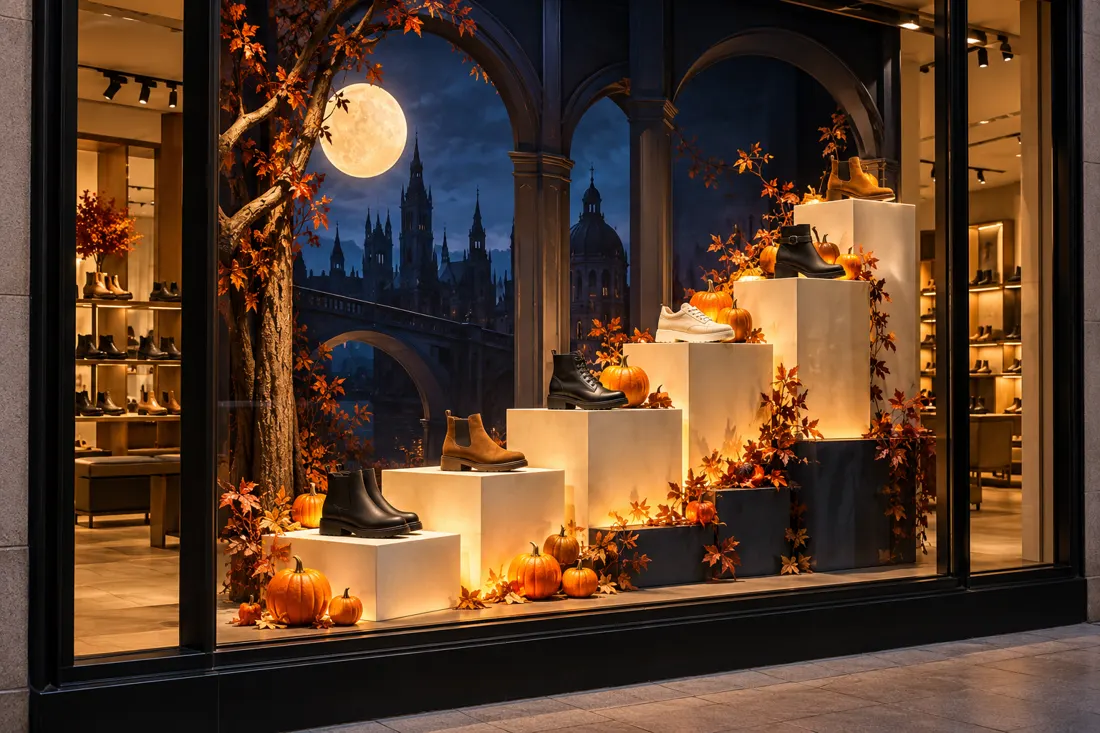
19. The Shoe-Store Midnight Staircase
Give footwear a clear visual rhythm. A stepped arrangement leads the eye through a tightly edited collection while a dark architectural backdrop supplies the Halloween mood. Each level needs enough space for a shopper to recognise the shoe shape.
You will need: Stepped plinths; moonlit backdrop; shoe supports.
Open the build recipe
- Position stable plinths in a deliberate ascending sequence.
- Put the strongest style at the most visible level.
- Use a different angle for each pair without losing the overall rhythm.
Make it shoppableOrganise the corresponding rail or shelves by the same story inside.
Avoid thisToo many pairs flatten the hierarchy and make the display look like storage.
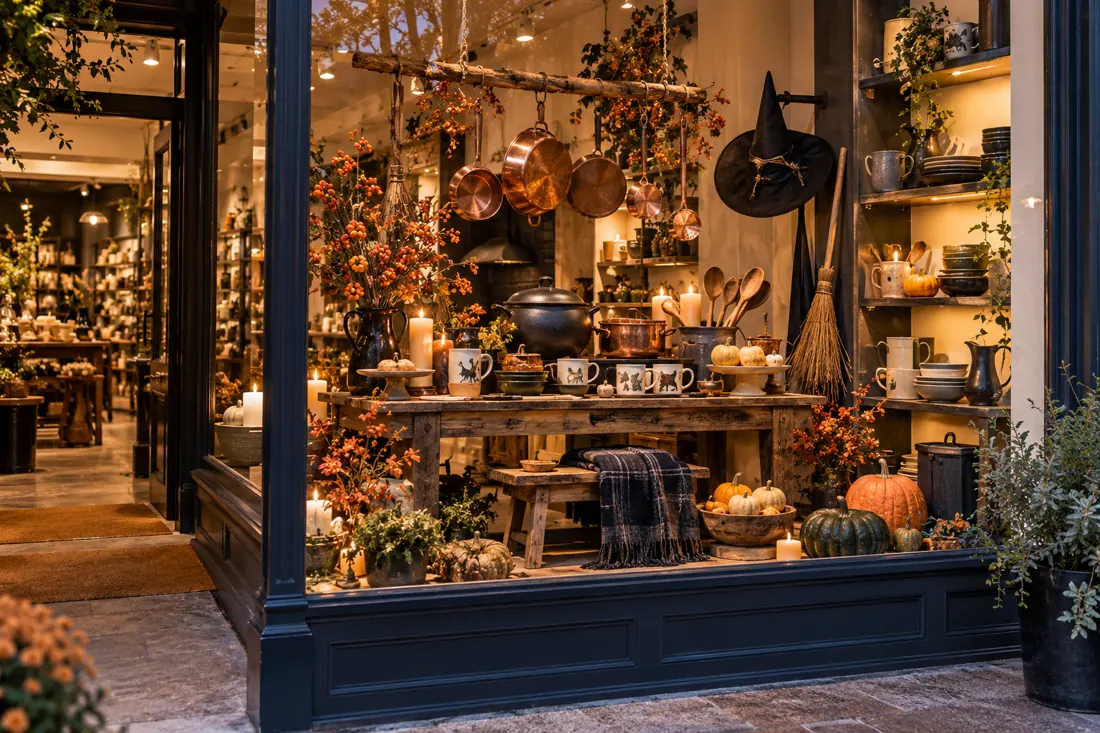
20. The Homeware Witch’s Kitchen
Turn a familiar kitchen into a gently enchanted one. Pots, bowls, cups and utensils do the selling; a hat and broom establish the seasonal story. This is an especially useful direction for stores whose Halloween opportunity is hosting and homeware rather than costumes.
You will need: Cookware; shelving; one broom and hat prop.
Open the build recipe
- Build a simple shelf-and-worktop composition.
- Group products into a believable cooking or serving scene.
- Add only a few theatrical details behind the merchandise.
Make it shoppableShow the matching place setting or cookware group inside.
Avoid thisLoose props should not obscure handles, product shapes or prices.
Make the whole street look
For deeper windows, confident brands and teams with more build time. Give each scene a clear centre and keep the entrance inviting.
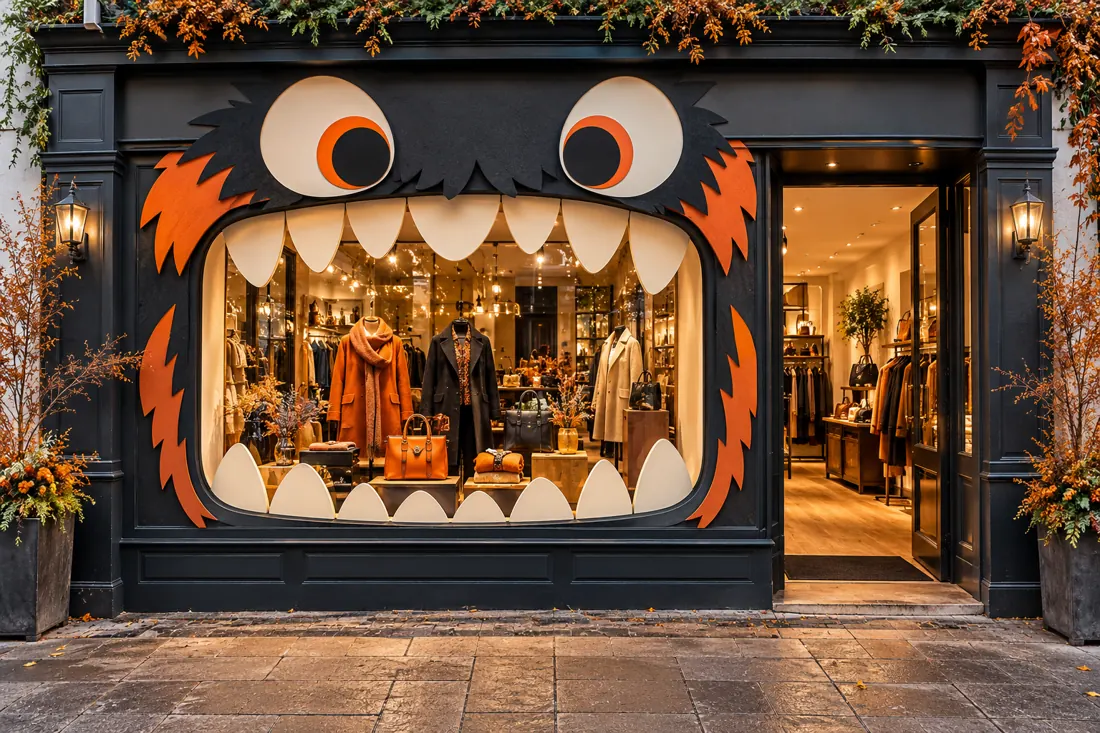
21. The Shop That Became a Monster
Let the shop itself become the character. Eyes above the window and a few oversized teeth around its edges create a friendly face visible from across the street. Keep the centre transparent so shoppers still understand what is for sale.
You will need: Lightweight panels; removable fittings; simple eye and tooth shapes.
Open the build recipe
- Sketch the face around the existing window geometry.
- Build lightweight edge pieces and use suitable secure fixings.
- Keep the door, clear opening and sightlines fully usable.
Make it shoppablePlace the most recognisable product group inside the monster’s “mouth”.
Avoid thisA dramatic facade fails if the entrance looks blocked or the shop looks closed.
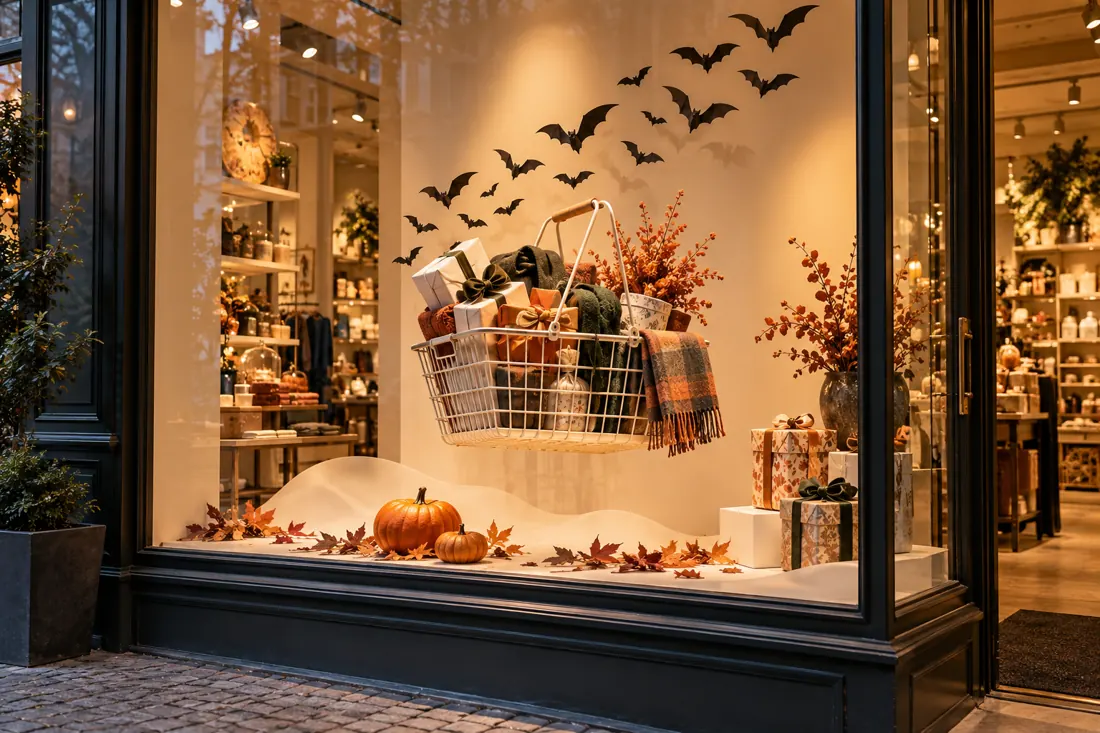
22. The Floating Shopping Basket
Make one everyday retail object seem to float. The illusion is stronger when the rest of the window stays simple and the basket contains a coherent gift selection. Use an engineered support or display fixture rather than relying on invisible-looking improvised suspension.
You will need: Light basket; transparent support; lightweight display products.
Open the build recipe
- Choose a lightweight basket and suitable rated display support.
- Arrange only the products needed for one gift story.
- Position the support so the illusion reads from the pavement.
Make it shoppableCreate the same basket as an available gift selection inside.
Avoid thisDo not hang heavy stock over a public route or from unsuitable fittings.
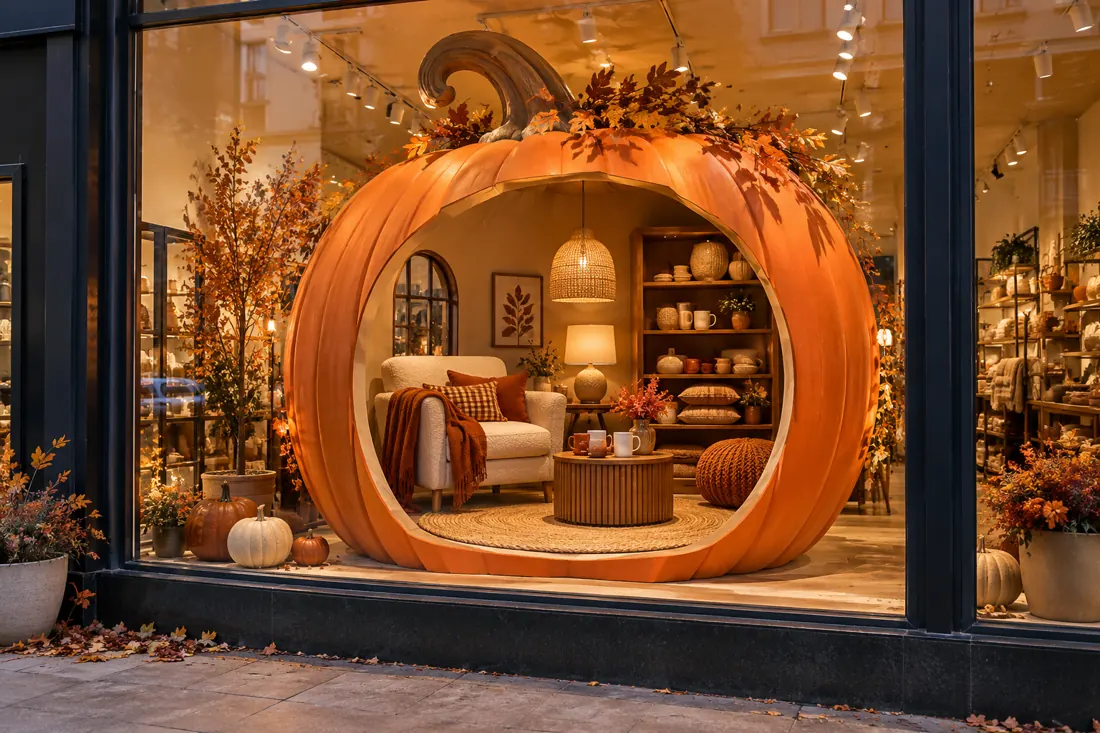
23. The Giant Pumpkin Cutaway
Open a giant pumpkin to reveal a tiny room. The circular cutaway gives the window a recognisable Halloween outline while the room lets customers imagine products in use. It suits deeper windows with a team that can build and maintain a small set.
You will need: Pumpkin-shaped set panel; room props; product lighting.
Open the build recipe
- Commission or construct a lightweight, stable cutaway surround.
- Stage one coherent room inside the opening.
- Keep the front merchandise larger and clearer than the background props.
Make it shoppableAdd a simple list of the room’s available products in the store.
Avoid thisA miniature set should not make the real products too small to recognise.
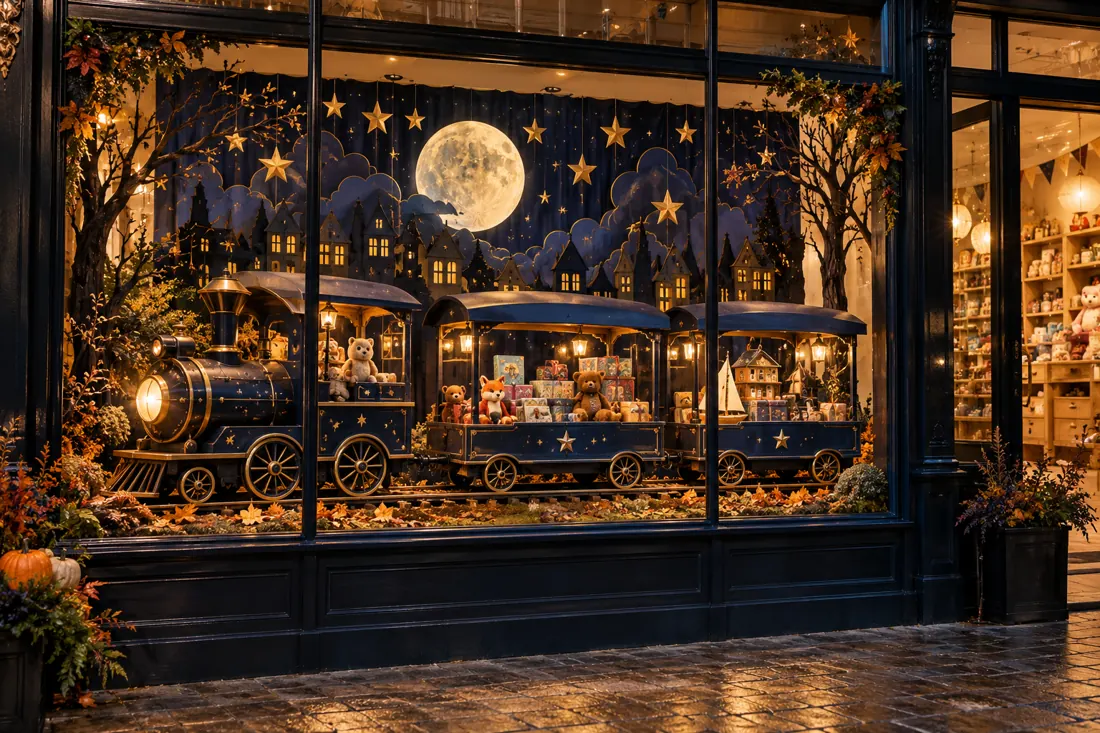
24. The Midnight Train Window
Use a midnight train to organise several gift categories into one story. A stationary model is easier to maintain than a moving train and still gives the eye a clear sequence. The last carriage can sit nearest the entrance, where the story continues inside.
You will need: Modular train carriages; static track; warm LEDs.
Open the build recipe
- Build or source a small set of stable, open carriages.
- Give each carriage a single product category.
- Use a consistent colour and lighting treatment across the scene.
Make it shoppableRepeat the category sequence on a nearby shop fixture.
Avoid thisAn elaborate train is only useful if the gifts are visible and replenishable.
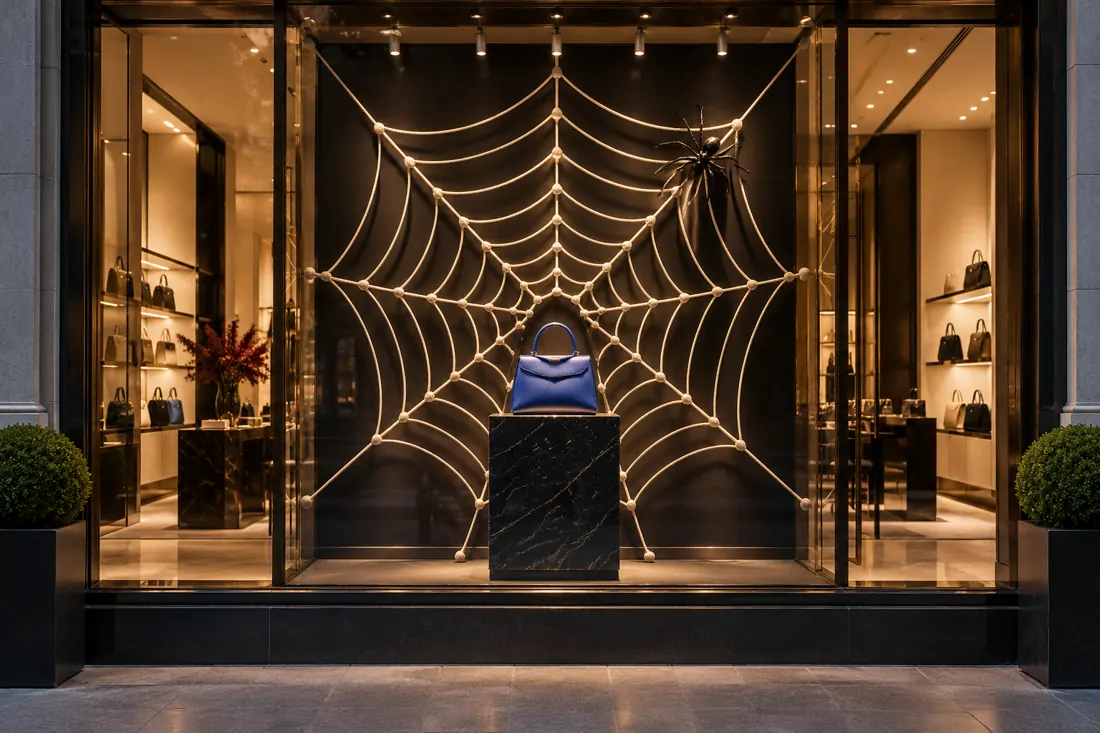
25. The Spider’s Product Showcase
Put one excellent product at the centre of the web. The geometry supplies the graphic impact while a clean pedestal protects the item’s shape. A restrained web works especially well for bags, footwear and small premium accessories.
You will need: Graphic web; plain pedestal; one small spider prop.
Open the build recipe
- Build the web as a flat graphic or secure backdrop.
- Place the product in front with a clear gap around it.
- Aim a separate light at the merchandise.
Make it shoppableChoose a product that stands out in both colour and silhouette.
Avoid thisStretching web material across the front of the product makes the display harder to read.
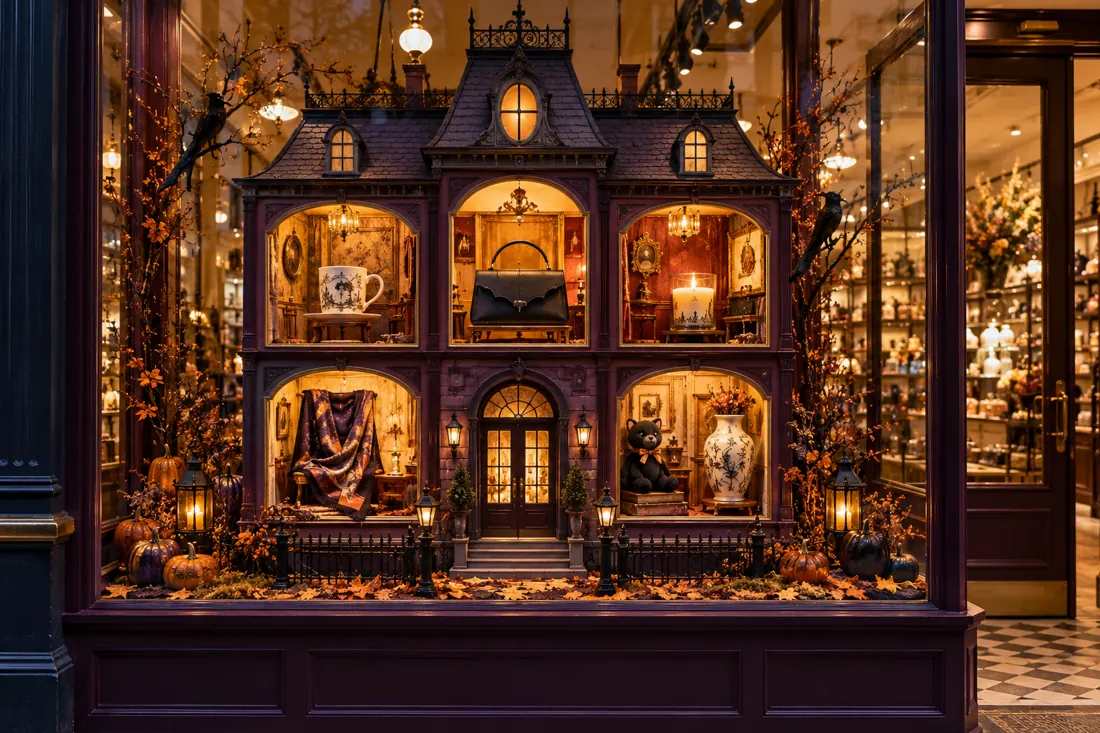
26. The Haunted Department Store
Make a haunted department store in miniature. Each room becomes a small stage for a different gift, so the architecture organises the assortment instead of becoming decoration around it. Keep the rooms open and the product count disciplined.
You will need: Open-front room modules; small lights; gift selection.
Open the build recipe
- Build a reusable grid of open-front rooms.
- Give every room its own product and a small visual detail.
- Use one house colour to hold the scene together.
Make it shoppableUse the rooms as a simple gift guide that staff can explain.
Avoid thisIf the products disappear inside tiny rooms, simplify the architecture.
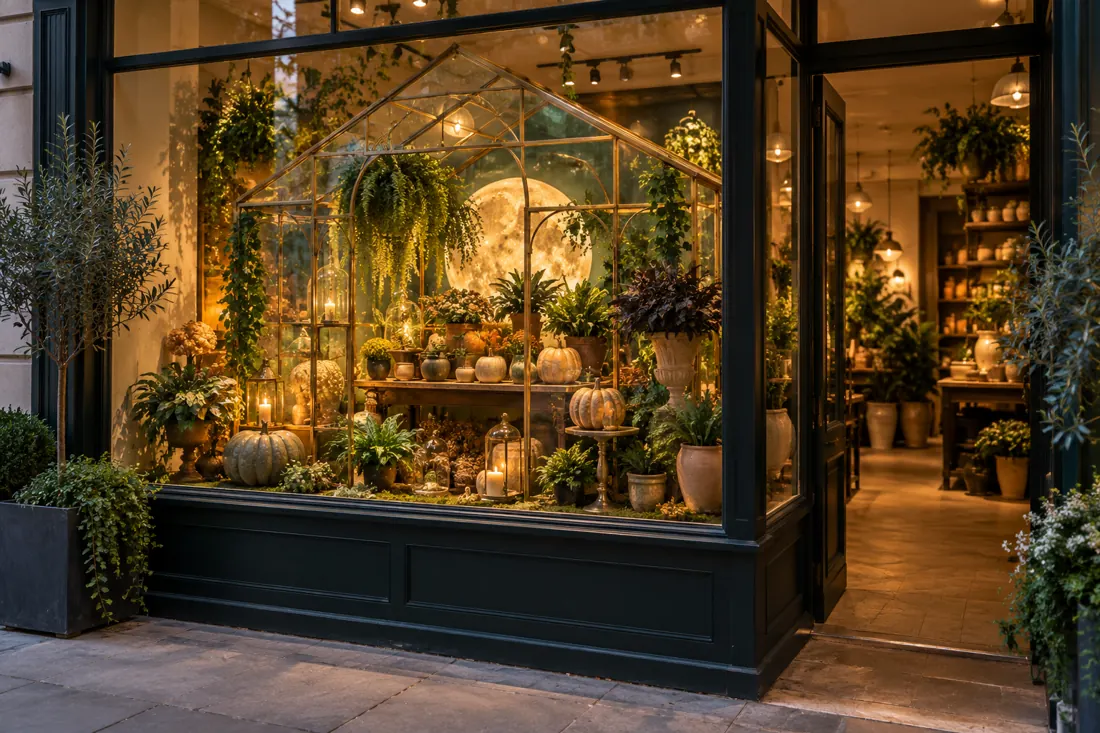
27. The Moonlit Greenhouse
Give a plant shop a greenhouse from a storybook. A fine frame and a moon-shaped background light create atmosphere without hiding the plants. Use the actual plants and pots you want to sell, with enough space to maintain them through the display period.
You will need: Greenhouse frame; potted plants; moon light.
Open the build recipe
- Install a stable open greenhouse frame.
- Arrange plants by height, keeping the strongest specimen clear.
- Add pumpkins and warm light below the leaf canopy.
Make it shoppableOffer a smaller ready-to-take-home version of the plant grouping.
Avoid thisCheck watering access, heat and the suitability of each plant for the window.
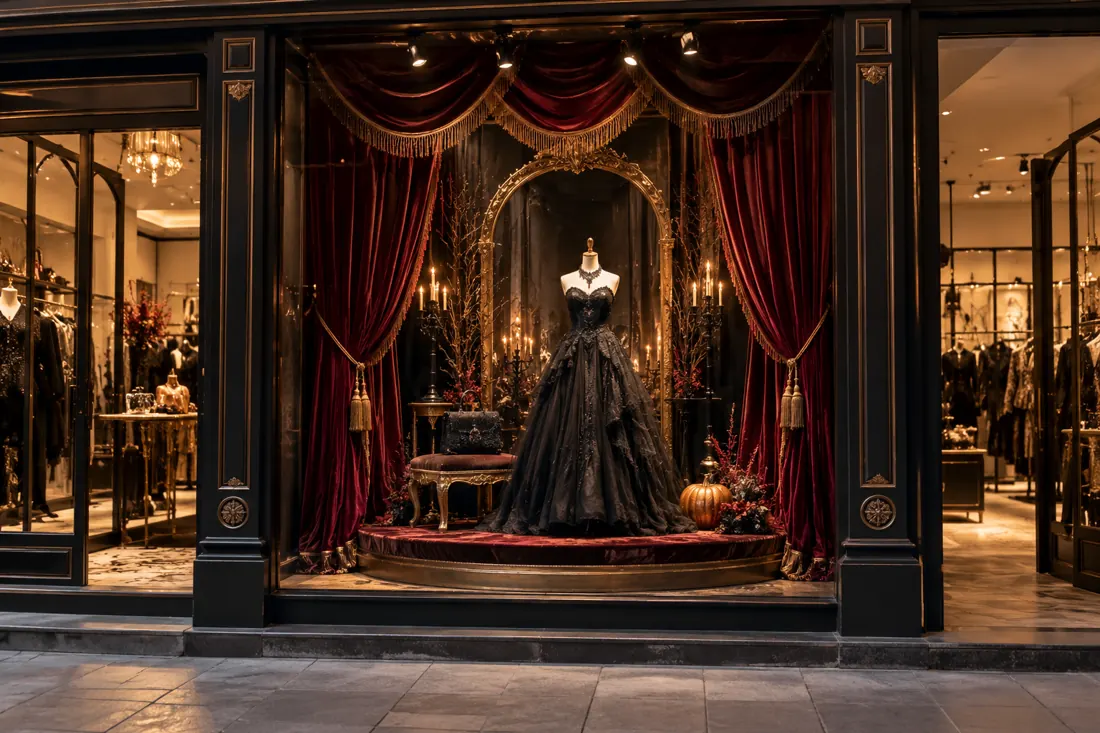
28. The Gothic Theatre
Give one outfit the opening-night treatment. Deep curtains, a low stage and controlled light create a theatrical Halloween window with very little literal decoration. This suits eveningwear and premium fashion when a novelty theme would feel out of place.
You will need: Curtains; stage-like plinth; mannequin.
Open the build recipe
- Draw curtains back far enough to reveal the full outfit.
- Place the mannequin on a stable low platform.
- Add one small seasonal cue and a focused light.
Make it shoppableComplete the look with the real shoes and accessories, not unrelated props.
Avoid thisCurtains should never shade the garment’s most important details.
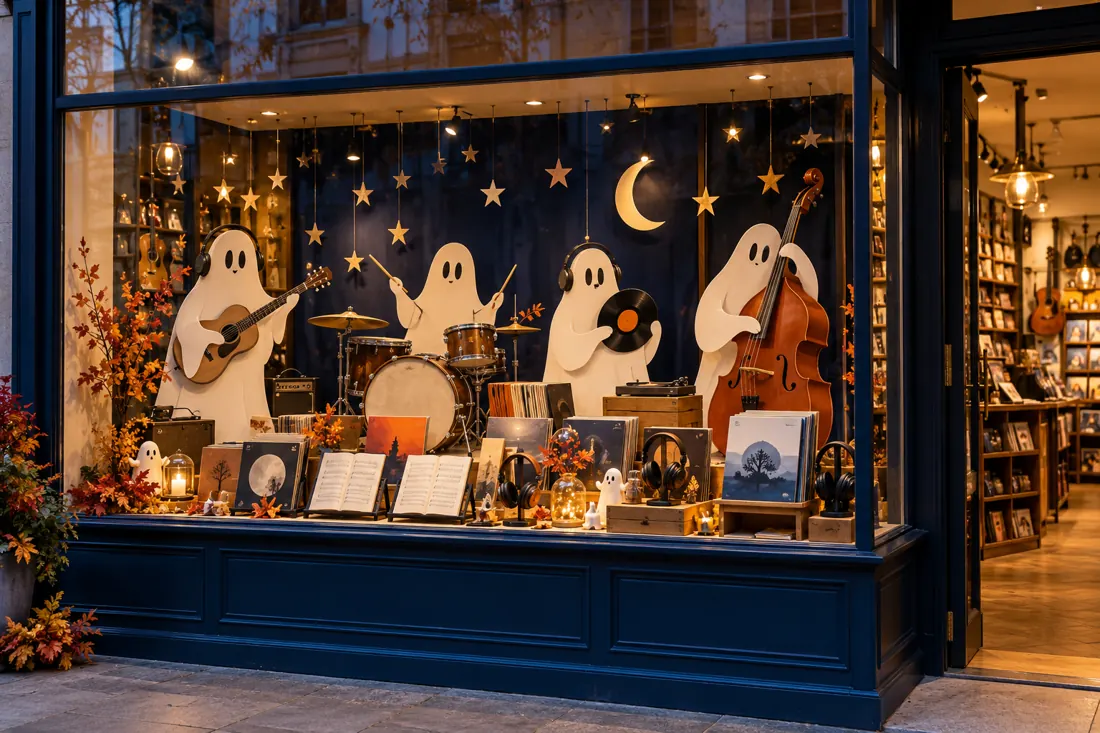
29. The Ghost Orchestra
Form a friendly midnight band behind the merchandise. The character shapes provide a recognisable visual joke, while records, headphones, books or music gifts make the offer clear. Keep the performers flat so the scene fits a modest window.
You will need: Flat ghost cut-outs; instrument silhouettes; music products.
Open the build recipe
- Create a small set of distinct musician silhouettes.
- Arrange them in an uneven rhythm, like a real group.
- Put the commercial product edit on a clean front shelf.
Make it shoppableGive customers a clear place to explore the featured music or products inside.
Avoid thisToo much miniature equipment adds complexity without helping the story.
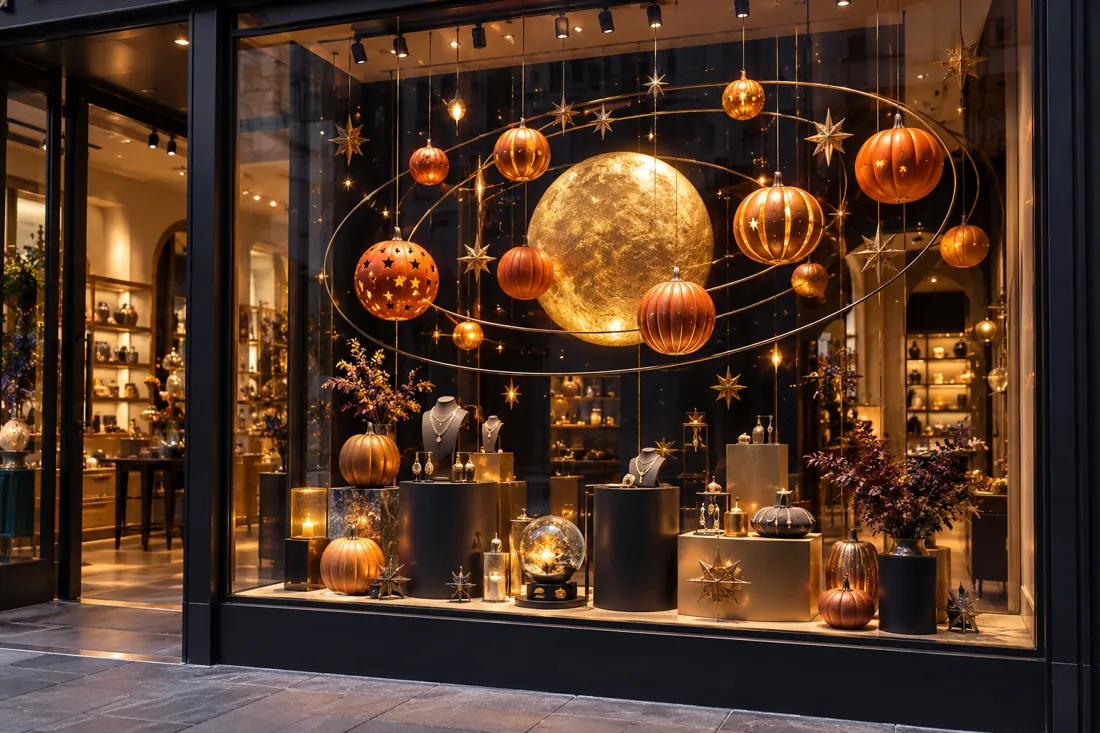
30. The Pumpkin Planetarium
Turn the window into a small Halloween universe. A few suspended forms create depth above an uncluttered product zone. The arrangement should feel intentionally orbital, with one central moon and a handful of supporting shapes rather than a ceiling full of random objects.
You will need: Lightweight pumpkin forms; secure hanging system; orbital shapes.
Open the build recipe
- Plan the hanging points and loads before building.
- Group lightweight forms at a few distinct heights.
- Keep the product area clear and separately lit.
Make it shoppableUse the same celestial palette in the featured accessory collection.
Avoid thisSuspended props must not obscure sprinklers, lights or access.
Give people something to discover
A small activity can make the window more engaging. Design the next step into the store, then measure participation and purchases separately.
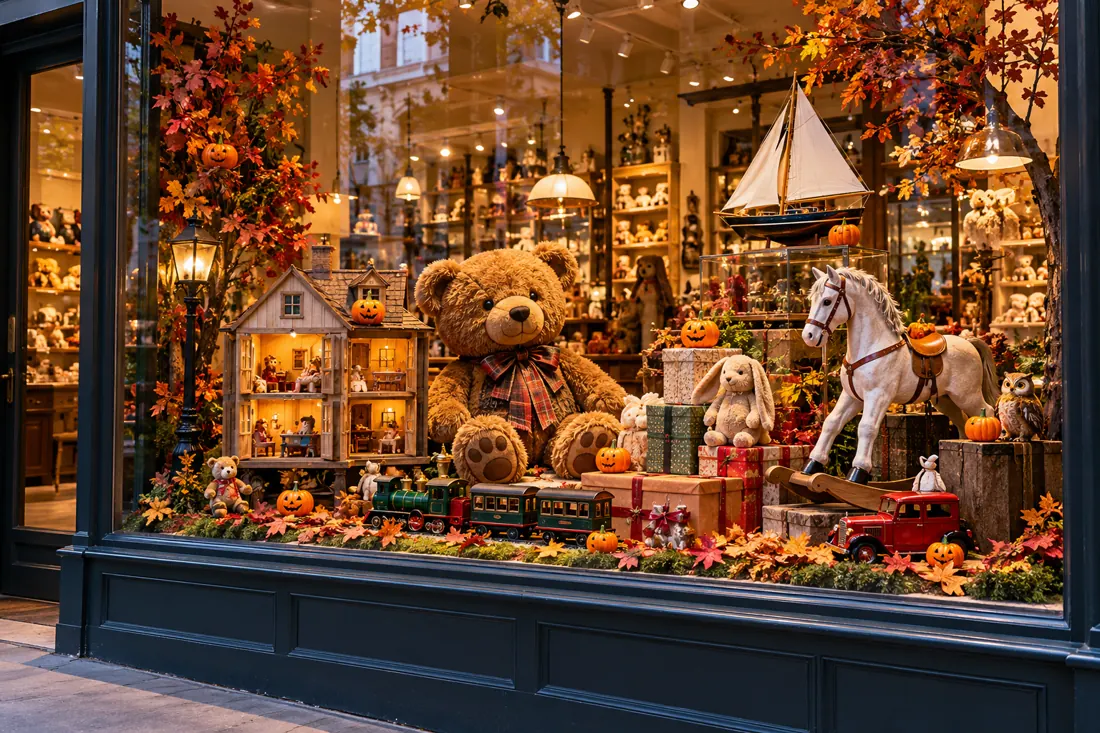
31. The Hidden Pumpkin Window
Hide a handful of pumpkins within an otherwise well-edited product window. The game encourages a second look without requiring technology. Make the challenge clear on a simple real-world window card, then place the answer or a small follow-on activity inside.
You will need: Small pumpkin symbols; a display checklist; existing stock.
Open the build recipe
- Choose a fixed number of easy-to-recognise symbols.
- Place them at varied heights without hiding the products.
- Check that the challenge can be completed from a safe viewing position.
Make it shoppableOffer an optional answer sheet inside without requiring a purchase.
Avoid thisParticipation counts are engagement, not proof that the display caused sales.
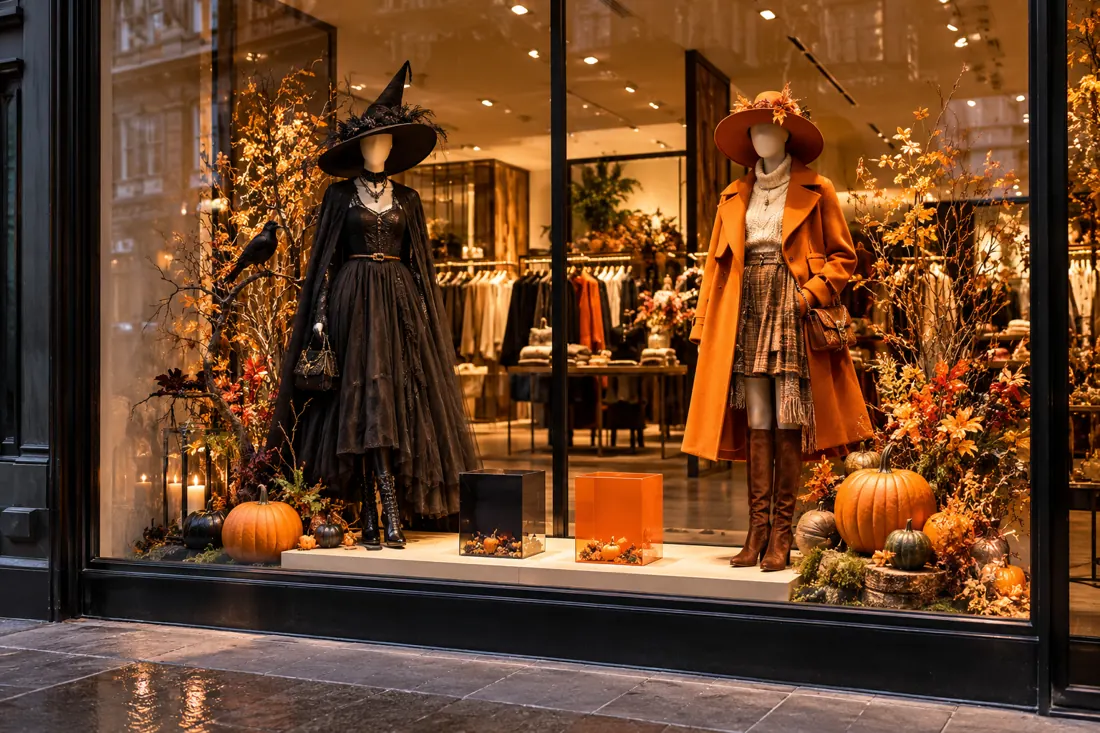
32. The Two-Look Costume Vote
Let shoppers choose between two Halloween-inspired looks. Both should be genuinely wearable and available. A small vote station inside creates a natural conversation about style without requiring a discount.
You will need: Two outfits; two token containers; simple printed labels.
Open the build recipe
- Create two complete looks with clearly different personalities.
- Give each a memorable name on a real printed label.
- Place the optional vote station away from the doorway.
Make it shoppableRecord questions and sales separately from votes; the most popular look may not be the best seller.
Avoid thisChanging the offer and stock at the same time makes results hard to compare.
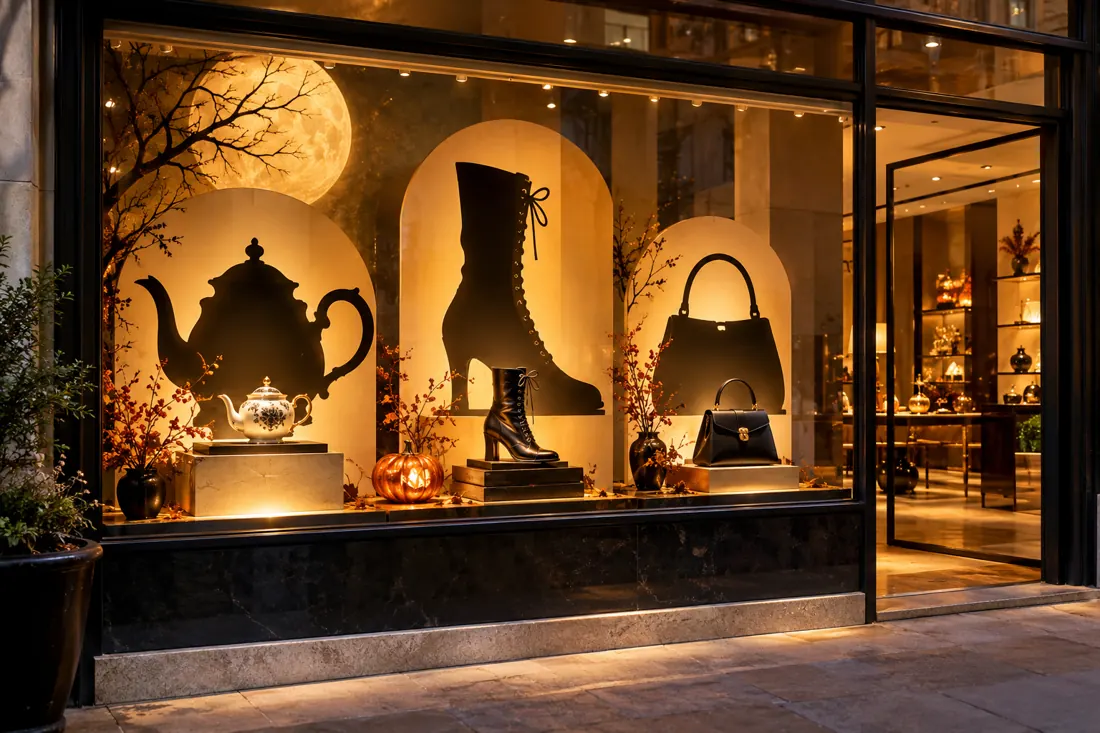
33. The Product Shadow Puzzle
Let shoppers match an object to its shadow. A teapot, boot or bag with a strong outline works better than a detailed box. The visual puzzle draws attention back to the merchandise instead of sending it towards a separate prop.
You will need: Product silhouettes; backing card; three real products.
Open the build recipe
- Choose three products with distinctive shapes.
- Cut an enlarged silhouette for each one.
- Place the real object close enough for the relationship to be understood.
Make it shoppableKeep the product choices consistent on the first display inside.
Avoid thisComplicated silhouettes make the activity frustrating rather than inviting.
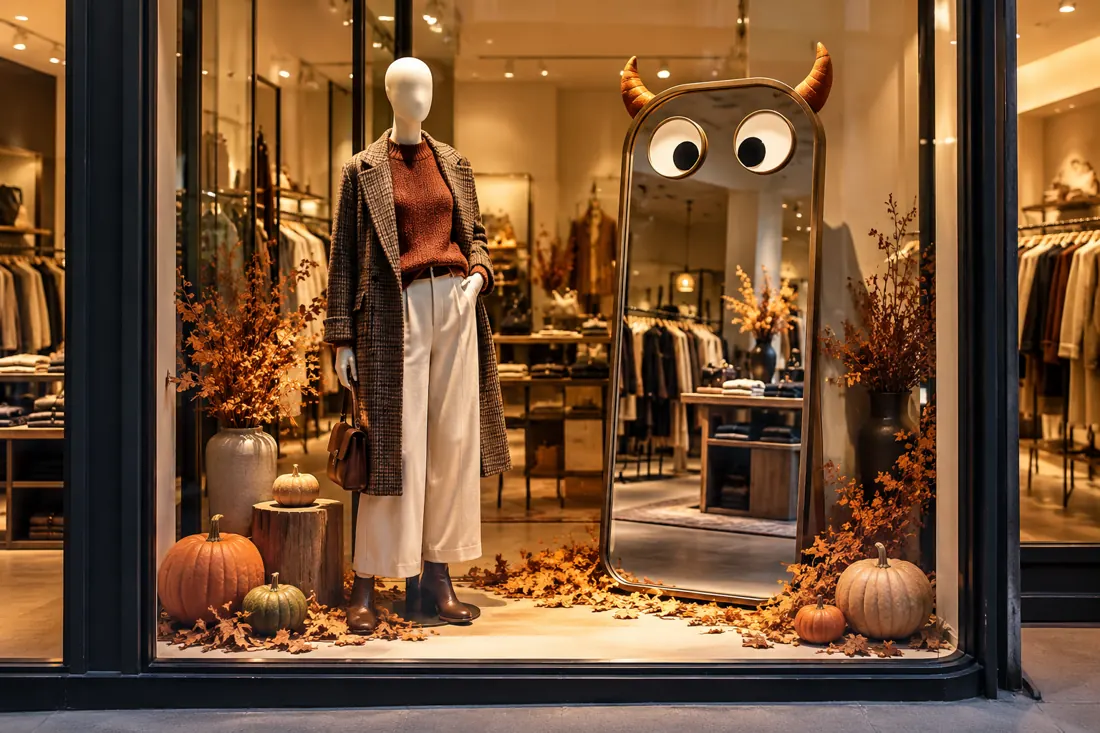
34. The Monster Mirror
Make the mirror the Halloween character. Friendly eyes and small horns turn a familiar retail object into a photo moment while a complete outfit beside it keeps the shop’s offer visible. Give the mirror a useful role beyond the photograph.
You will need: Stable mirror; removable eye and horn shapes; styled outfit.
Open the build recipe
- Secure an appropriate mirror in a protected display position.
- Add removable features around its edges.
- Place an outfit or accessory edit beside it and check reflections.
Make it shoppableInside, direct customers to a real mirror where they can try the featured pieces.
Avoid thisReflections of stockrooms, glare or clutter can spoil the entire composition.
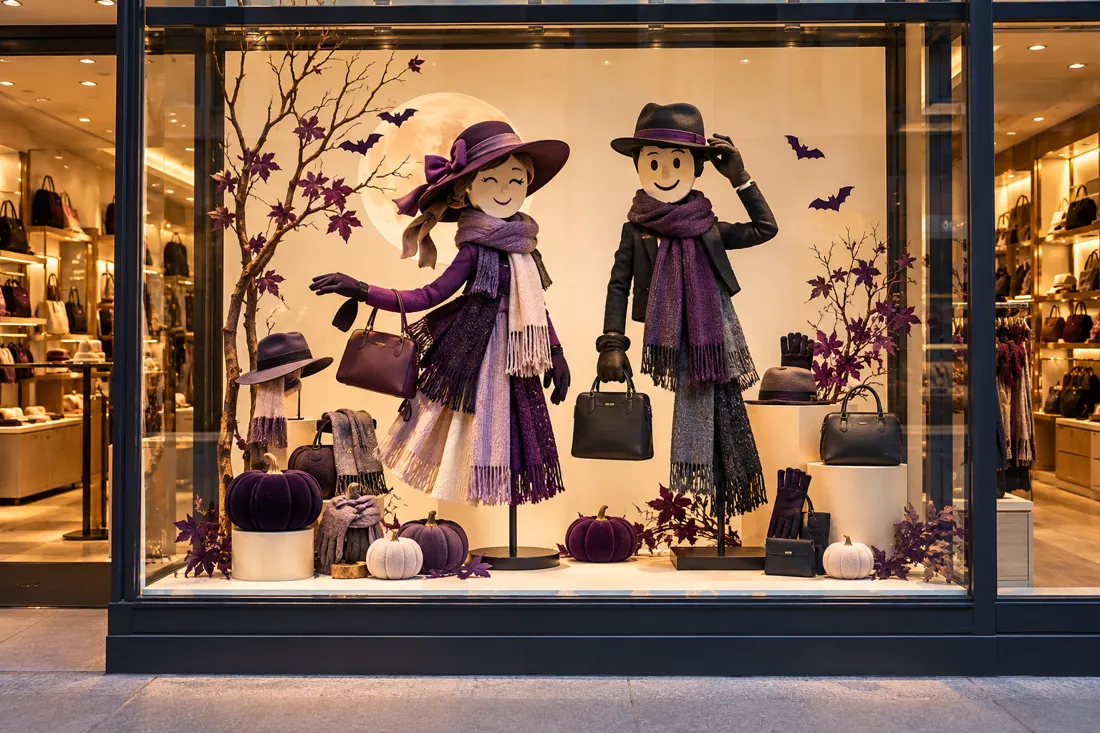
35. The Build-a-Character Window
Build the characters from the range. A hat, scarf, gloves and bag can suggest a personality without a detailed face or expensive prop. It is a useful way to sell accessories as a combination while keeping the Halloween styling light.
You will need: Display forms; hats; scarves; gloves.
Open the build recipe
- Choose two distinct accessory combinations.
- Arrange them on secure forms at believable proportions.
- Use a quiet background so the products form the characters.
Make it shoppablePlace the matching combinations together inside for easy selection.
Avoid thisDo not stretch, pin or crease saleable stock to force the pose.
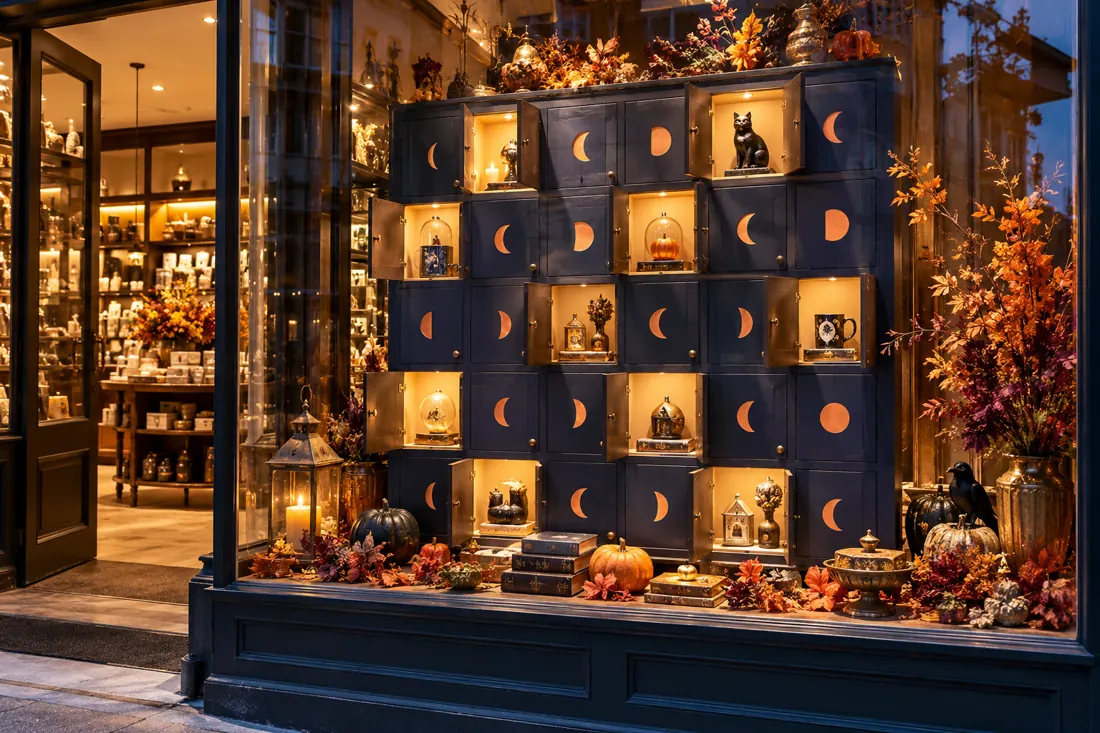
36. The Daily Product Reveal
Give regular passers-by something new to discover. A cabinet with a few opening doors can reveal a featured product each day in the final week. The visible change supplies the story; the actual stock gives that curiosity a purpose.
You will need: Reusable flap cabinet; product samples; a reveal schedule.
Open the build recipe
- Build a small, durable cabinet with safely secured doors.
- Assign a genuinely available product to each reveal.
- Set a staff-owned time for opening and resetting the display.
Make it shoppableRepeat each reveal on the relevant in-store shelf.
Avoid thisDo not promise a daily reveal your team cannot maintain.
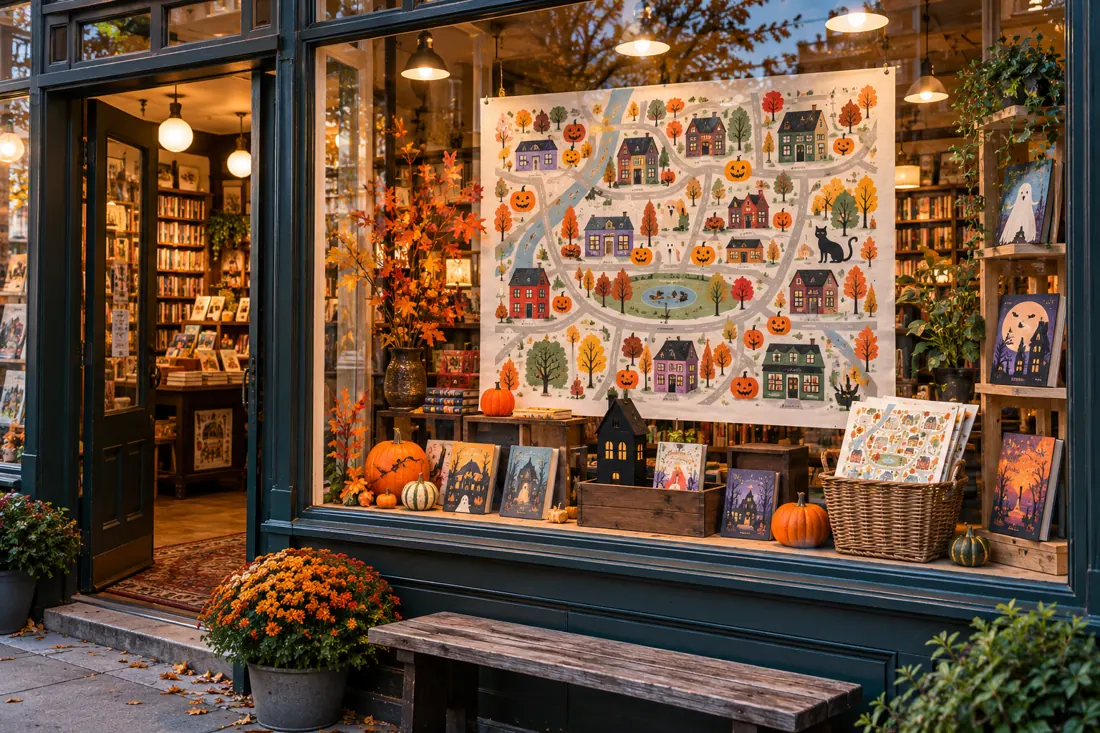
37. The Neighbourhood Monster Map
Connect the window to the neighbourhood. A short trail of participating shops can give families a reason to explore the street. Keep the map simple, agree the details with every shop and make the experience easy to complete.
You will need: Simple local map; window markers; printed trail sheets.
Open the build recipe
- Choose a small group of nearby willing businesses.
- Mark one easy-to-find character in each window.
- Make the same accurate route sheet available inside each participating shop.
Make it shoppablePair the map pickup point with a relevant product selection without making purchase compulsory.
Avoid thisUnconfirmed opening hours or missing trail stops frustrate visitors.
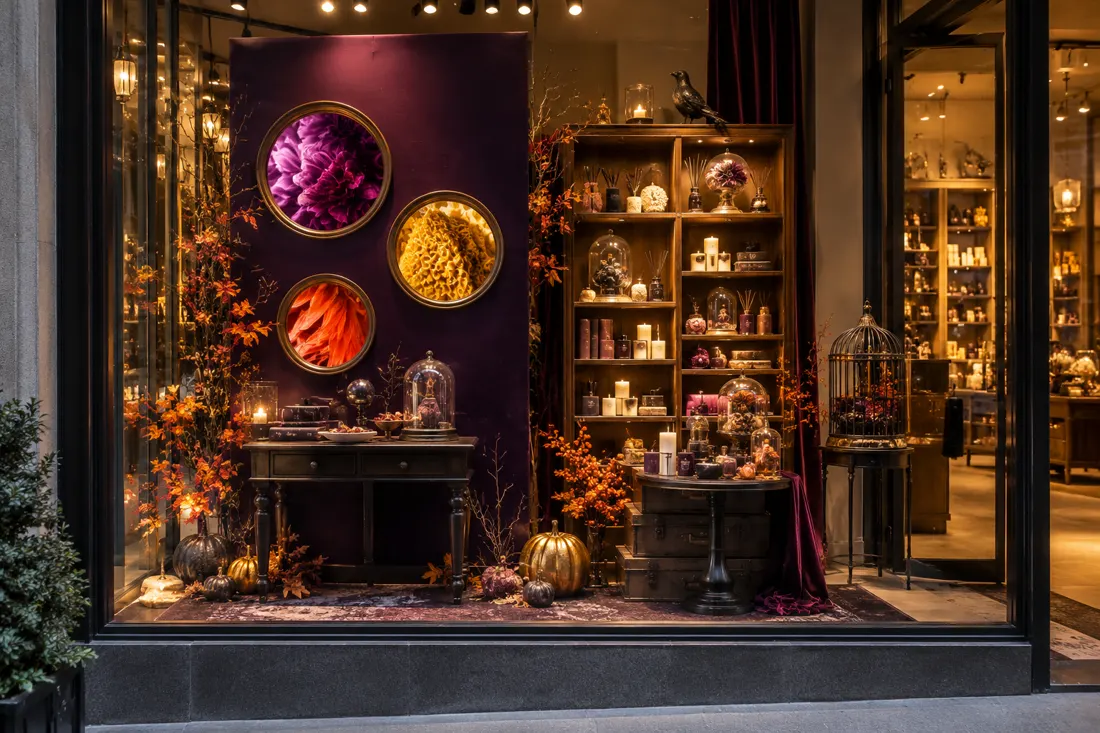
38. The Guess-the-Object Cabinet
Reveal just enough to create curiosity. A few openings show a texture, colour or detail from a product, while a complete version nearby keeps the store offer understandable. The best version makes people want to inspect the object, not solve a difficult puzzle.
You will need: Stable panel; viewing openings; product samples.
Open the build recipe
- Make a secure panel with smooth, accessible viewing openings.
- Position products so each opening reveals a useful detail.
- Provide a clear view of the complete range alongside it.
Make it shoppableOffer the revealed products at an obvious fixture inside.
Avoid thisAvoid arrangements that require people to crowd, bend awkwardly or touch the glass.
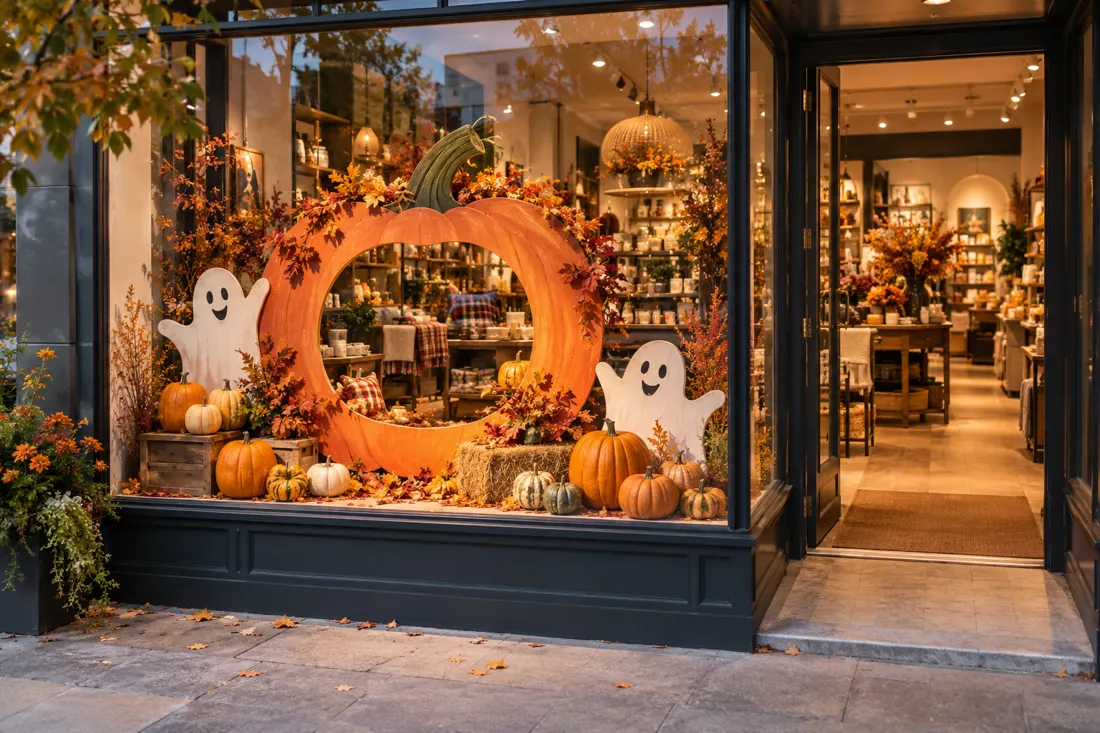
39. The Family Photo Frame
Create a photo moment that still leaves room for shopping. A pumpkin-shaped frame can be enough; the window behind it supplies the setting. The route to the entrance must stay clear even when a family stops.
You will need: Stable photo frame; friendly cut-outs; clear viewing area.
Open the build recipe
- Position a stable frame within your permitted display area.
- Check the photograph from adult and child heights.
- Keep the products and shop entrance visible in the composition.
Make it shoppablePlace the featured family products just inside the store.
Avoid thisPhoto activity and social reach should be measured separately from purchases.
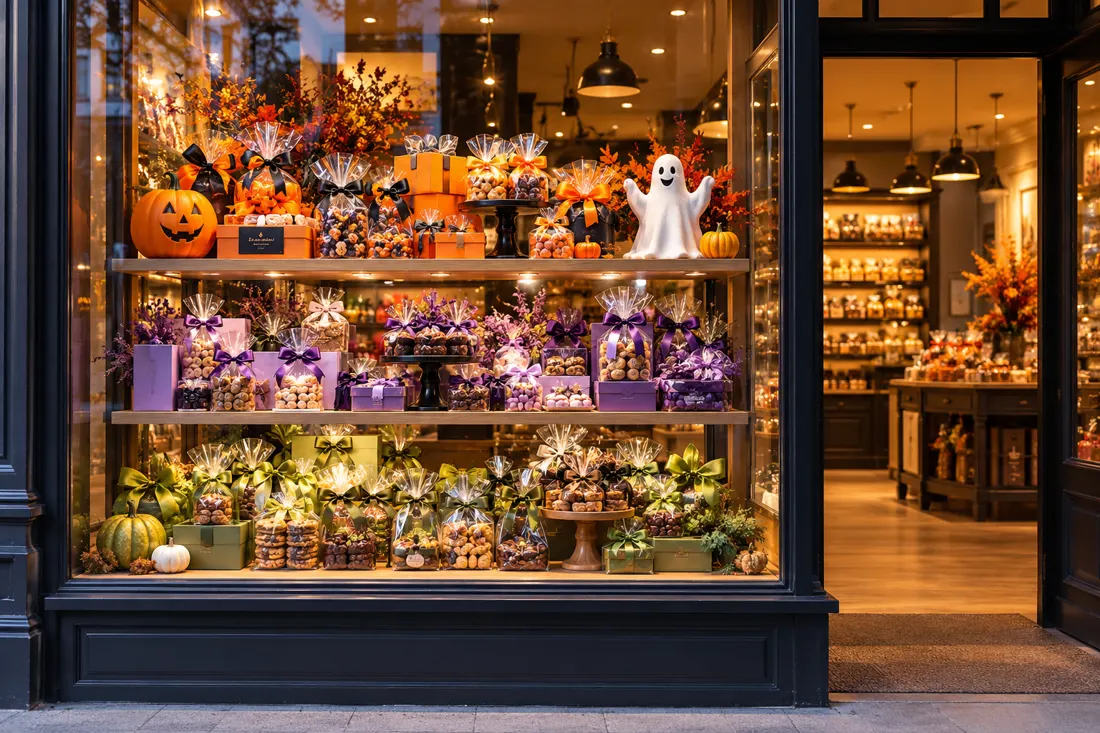
40. The Choose-Your-Treat Shelf
Help customers choose quickly. A small set of clearly different treat bundles turns the window into a useful shopping aid, with Halloween props only supplying the frame. Organise the options by a real preference or occasion rather than an arbitrary colour scheme alone.
You will need: Packaged treat bundles; tiered shelves; three colour cues.
Open the build recipe
- Choose three genuinely different, available bundles.
- Display each as a complete product with clear real-world information.
- Mirror the arrangement at the service or collection point.
Make it shoppableMake ingredients, allergens and pricing available through the normal store process.
Avoid thisA bundle that looks available in the window should not be sold out inside.
Keep the props. Change the season.
Build around materials and fixtures that can work again. These ideas combine Halloween character with a practical plan for November.
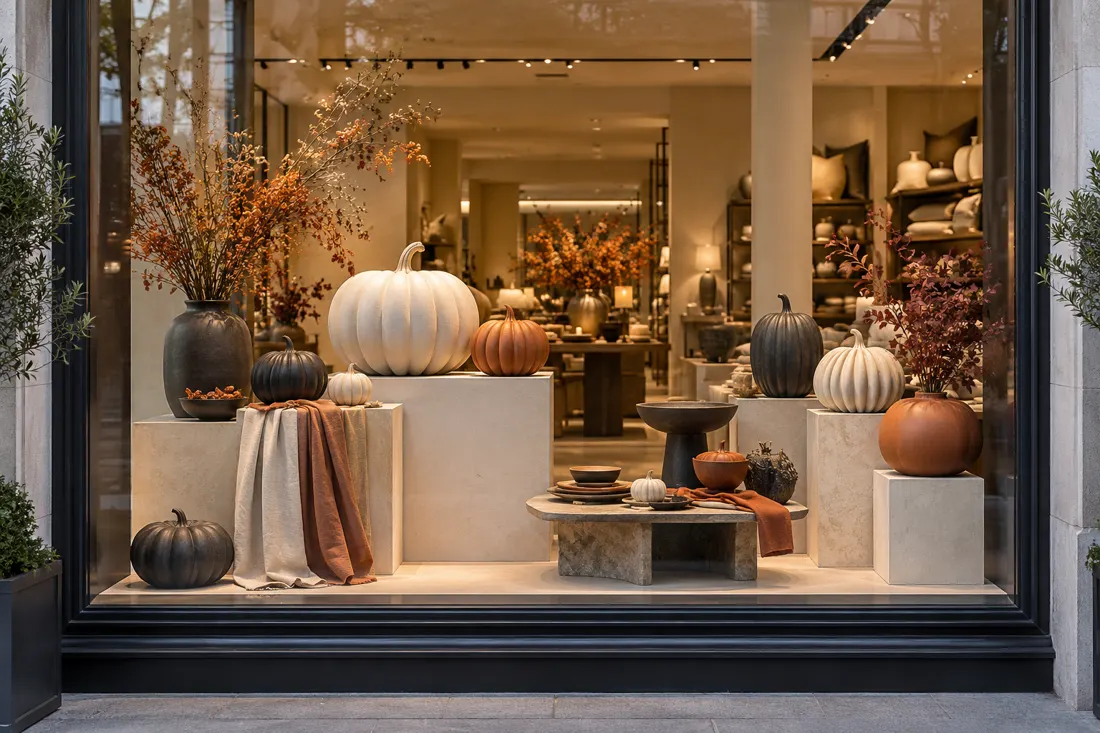
41. The Monochrome Pumpkin Gallery
Treat pumpkins as sculptural shapes. A restrained palette and generous space make the window feel like a small gallery, which suits design-led homeware and gift stores. The merchandise should share the display’s material language so the props and stock belong together.
You will need: Reusable pumpkin forms; plain plinths; ceramics.
Open the build recipe
- Choose a small number of forms in related finishes.
- Place ceramics or textiles at deliberate focal points.
- Check that the product colours stay distinct from the props.
Make it shoppableUse a matching tabletop arrangement inside the shop.
Avoid thisA monochrome scheme needs texture and lighting to avoid looking flat.
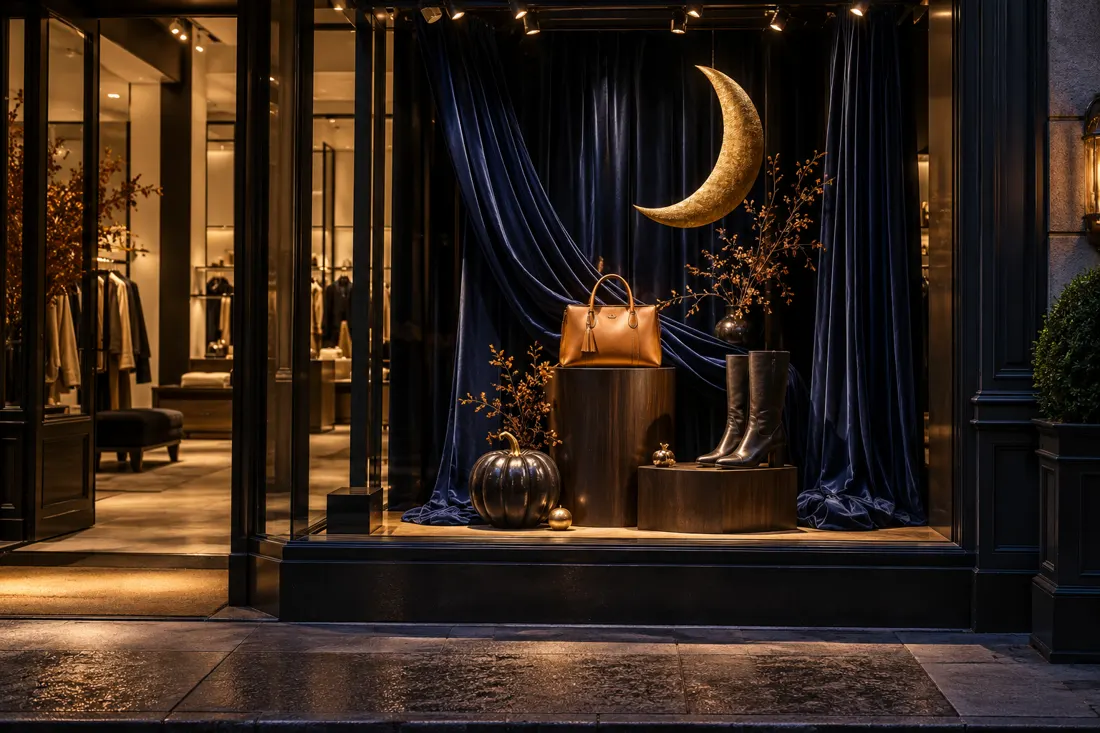
42. The Velvet Night Window
Create a rich night-time setting with fabric and light. Velvet gives depth behind leather, knitwear and footwear while small metallic details catch the eye. Keep the Halloween cue subtle so the display remains useful beyond one evening.
You will need: Reusable velvet; dark plinths; brass details.
Open the build recipe
- Hang fabric in a few generous folds.
- Give each product its own clear outline against the backdrop.
- Add one brass or moon-shaped detail and a small seasonal prop.
Make it shoppableCarry the same palette into an available outfit or gift selection.
Avoid thisDark fabric absorbs light; inspect product visibility from outside.
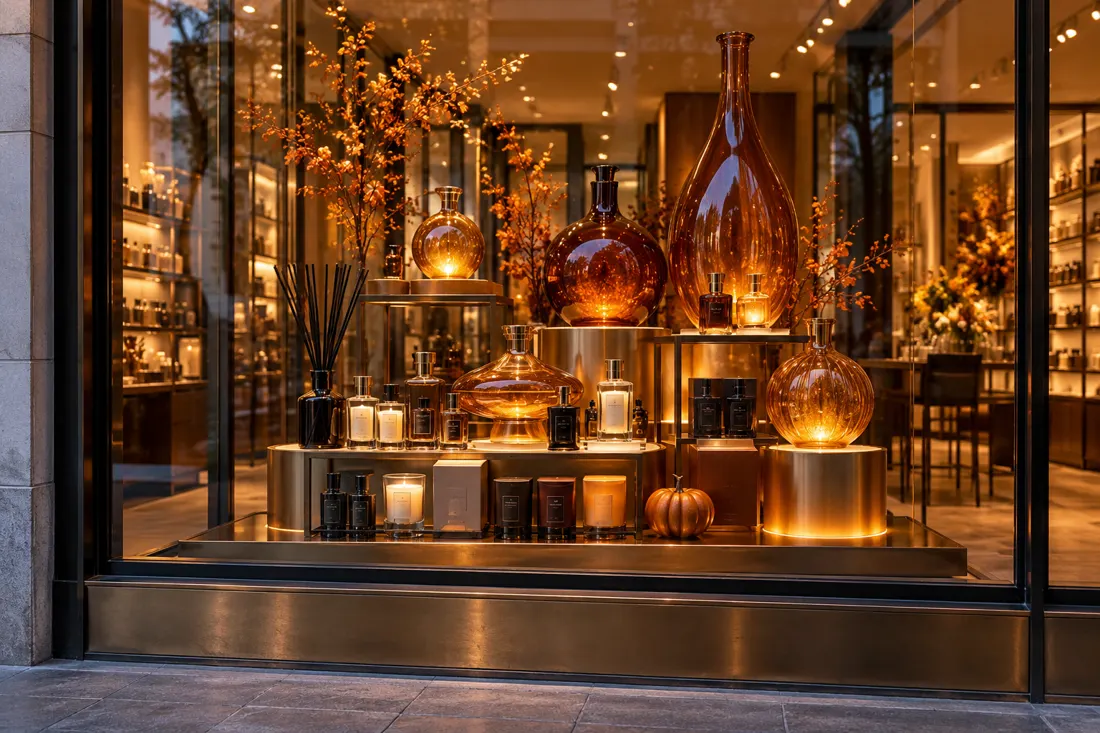
43. The Amber Glass Cabinet
Use amber glass to create warmth without smoke or flame. A few lit vessels behind real fragrance products give the window a potion-like glow. The lighting should make packaging easier to see rather than tinting every product the same orange.
You will need: Amber vessels; safe LED bases; fragrance products.
Open the build recipe
- Select stable decorative vessels and suitable LED lighting.
- Place the original product containers in a clear foreground.
- Conceal cables and check reflections after dark.
Make it shoppableOffer a normal staffed fragrance test inside the store.
Avoid thisDo not place saleable products on unstable or heat-producing lighting equipment.
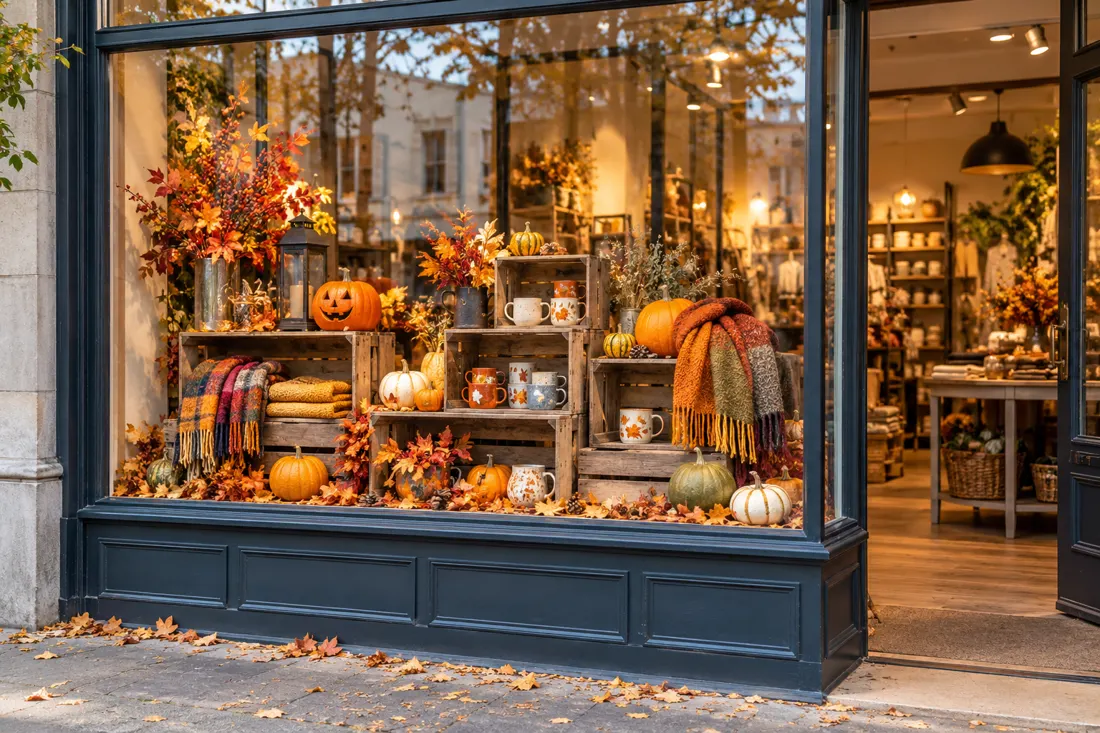
44. The Reclaimed-Crate Harvest
Give everyday fixtures a second seasonal job. Stable crates form useful display levels for scarves, mugs and gifts, while a few pumpkins establish Halloween. The result feels deliberate when the crates share a finish and the product selection is tightly edited.
You will need: Existing crates; liner cloth; autumn props.
Open the build recipe
- Inspect and secure the crates before stacking.
- Line rough surfaces where they meet stock.
- Place heavier products low and reserve the clearest level for the hero item.
Make it shoppableUse the same product grouping on a nearby table.
Avoid thisReclaimed material still needs to be clean, stable and suitable for the setting.
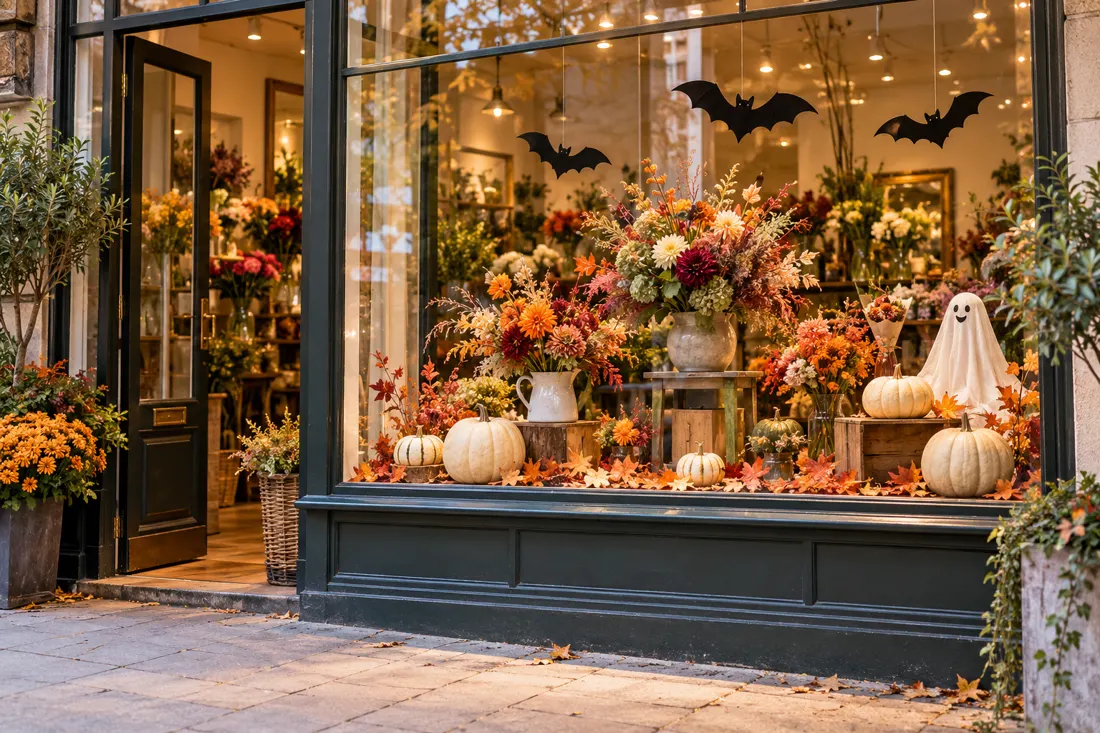
45. The Autumn-to-Halloween Switch
Add Halloween as a removable layer to the autumn window. This is useful when the display already works and the store has little time for a rebuild. Choose a few details that can be lifted away on 1 November without disturbing the main composition.
You will need: Existing autumn display; removable bats; one ghost shape.
Open the build recipe
- Keep the strongest existing product arrangement.
- Add a small number of motifs where they frame, rather than cover, it.
- Photograph the base layout so staff can restore it easily.
Make it shoppableRefresh the merchandise when you remove the seasonal layer.
Avoid thisAdding new props everywhere makes an efficient update look improvised.
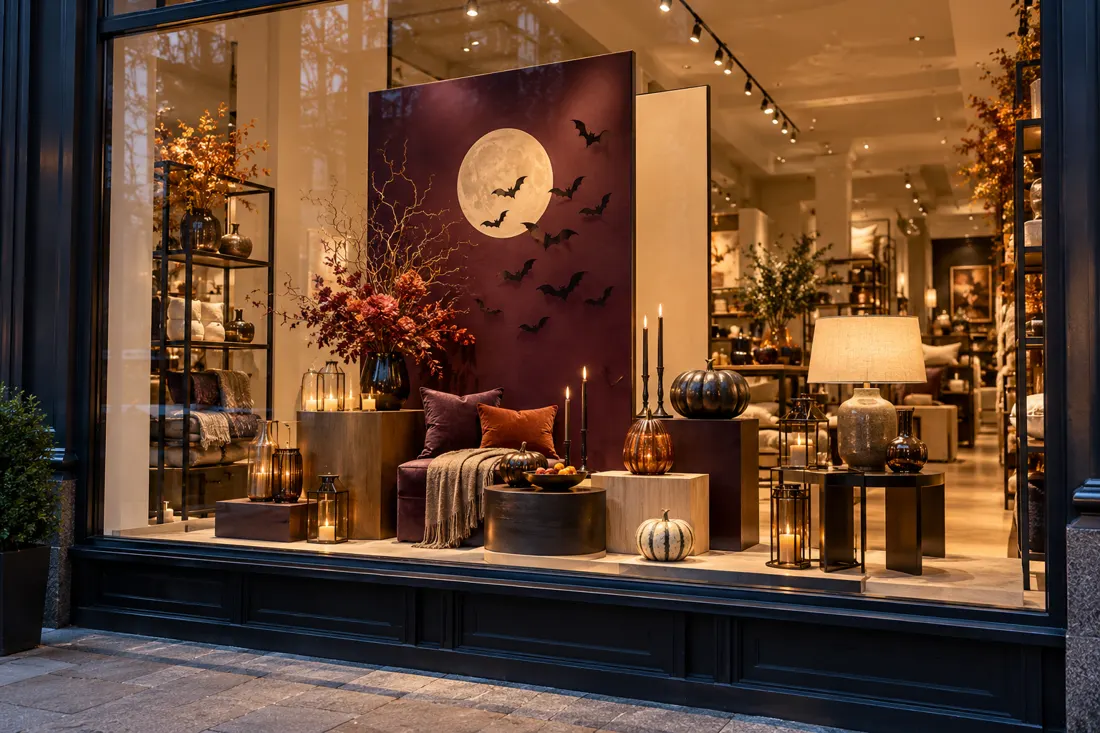
46. The Reversible Backdrop
Plan the next window before finishing this one. A reversible panel gives Halloween its own mood while preserving a neutral face for the following display. It is most useful for retailers that regularly change campaigns but reuse their fixtures.
You will need: Freestanding panel; two finishes; reusable fixings.
Open the build recipe
- Choose a stable panel system suitable for the space.
- Apply the Halloween treatment to one side and a neutral finish to the other.
- Keep attached details removable so the panel can turn cleanly.
Make it shoppablePlan the November product edit at the same time.
Avoid thisCheck the turning space and stability before loading products around the panel.
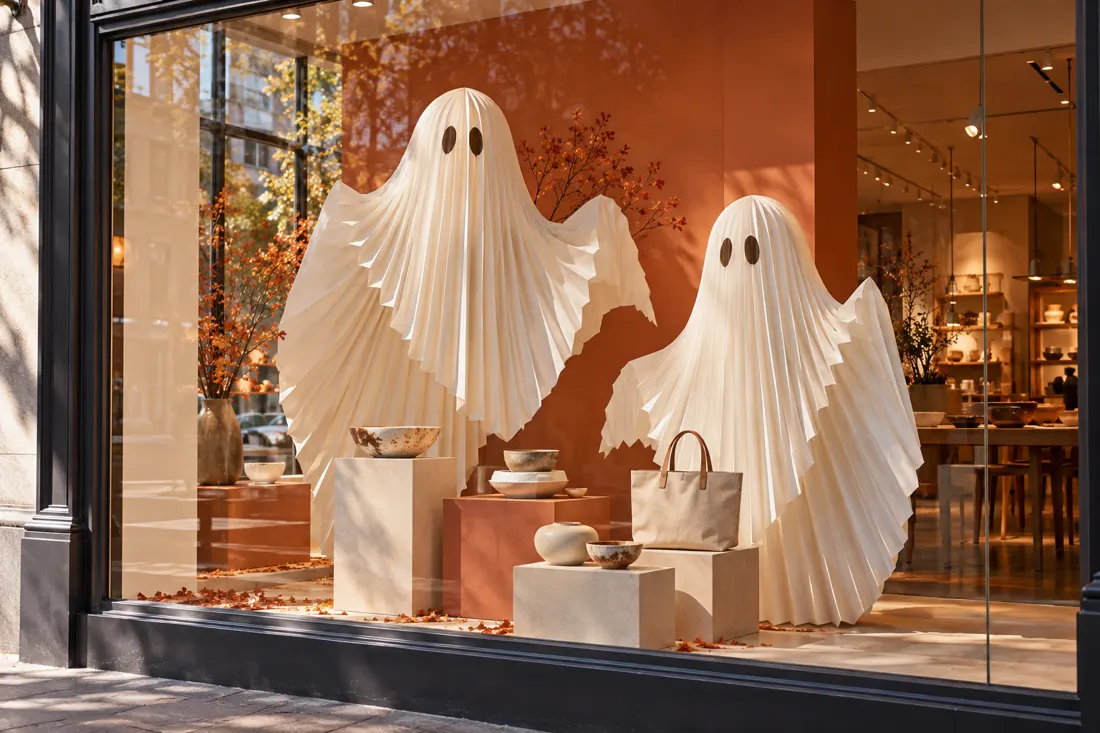
47. The Paper Sculpture Studio
Make the craft visible. Large folded-paper ghosts feel more considered than a bag of small plastic decorations, especially beside ceramics, books and stationery. The folds supply texture; the simple shapes make the idea readable.
You will need: Heavy paper; folding templates; secure supports.
Open the build recipe
- Make a test piece before cutting the full-size sheets.
- Use a small family of related folds and proportions.
- Place the sculptures behind the commercial product zone.
Make it shoppableRepeat a small folded detail on an in-store product table.
Avoid thisPaper needs protection from moisture, heat and repeated handling.
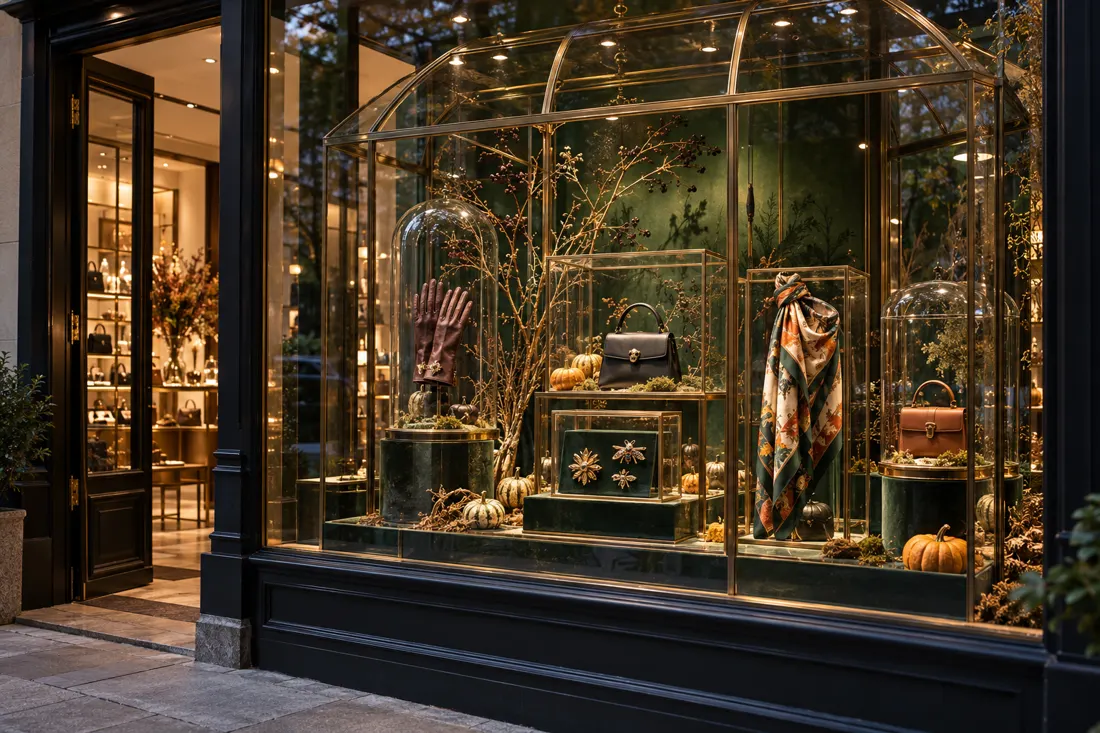
48. The Glasshouse of Curiosities
Give accessories the appeal of discovered objects. A glass cabinet, careful spacing and a restrained seasonal detail turn everyday items into a collection worth inspecting. The treatment works well when materials and craftsmanship are the selling points.
You will need: Existing glass cases; plain stands; a few natural props.
Open the build recipe
- Choose a small collection with a coherent story.
- Give each product a clear stand and visible angle.
- Add only enough natural or Halloween detail to establish the setting.
Make it shoppableMake product names and prices easy to check inside.
Avoid thisA cabinet crowded with props feels less valuable and is harder to shop.
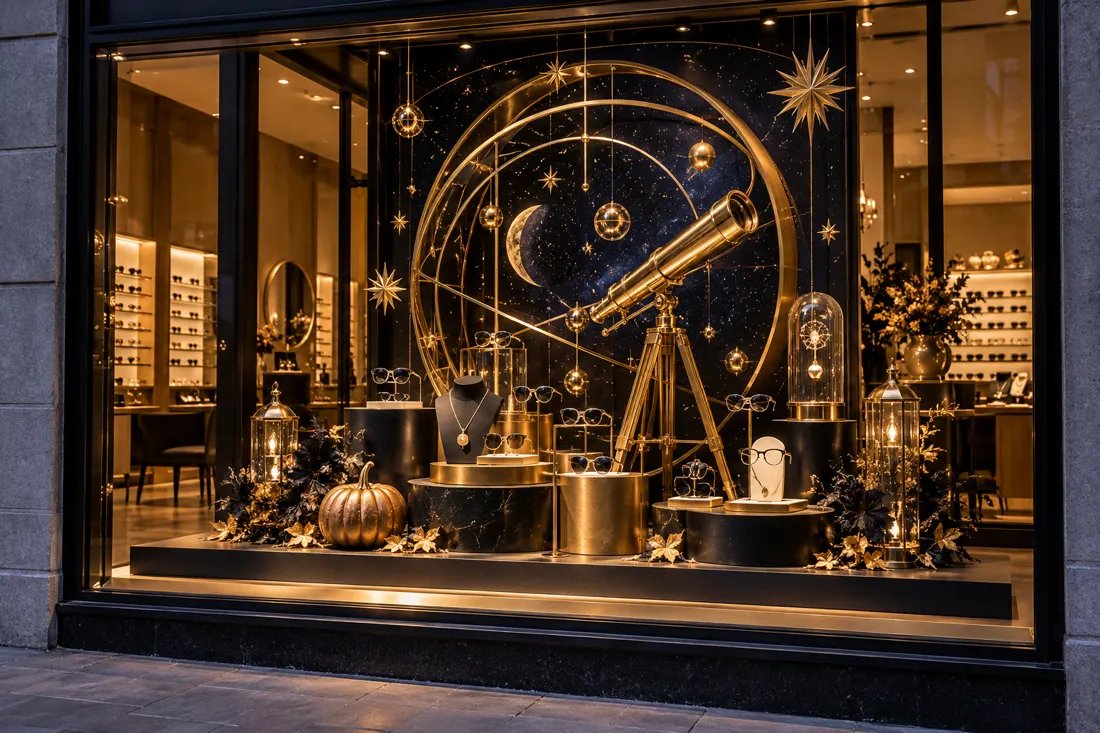
49. The Black-and-Gold Observatory
Look beyond pumpkins for a Halloween mood. An observatory setting creates a mysterious night-time story for eyewear, watches and jewellery. Brass lines and circular forms can organise small products without competing with their detail.
You will need: Telescope prop; orbital shapes; small product stands.
Open the build recipe
- Place one telescope or celestial prop at the back.
- Arrange orbital shapes around, not over, the merchandise.
- Use clean spotlights for the real products.
Make it shoppableConnect the setting to the actual collection’s design or materials.
Avoid thisThe largest prop should not become the only object people remember.
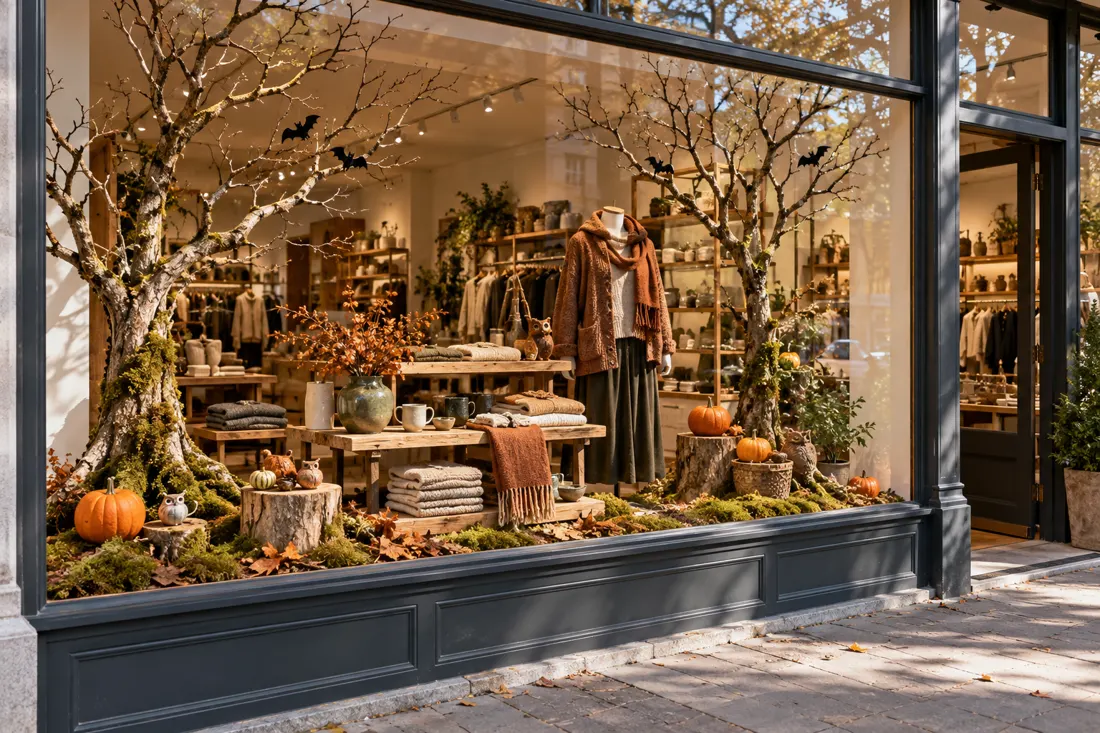
50. The November-Ready Woodland
Build a woodland that can stay when Halloween leaves. Branches, warm wood and neutral textures support autumn stock; removable bats and pumpkins provide the temporary seasonal layer. Plan the next merchandise change so the display evolves instead of simply losing its decorations.
You will need: Reusable branches; wood shelves; removable motifs.
Open the build recipe
- Make the neutral woodland structure first.
- Add a limited Halloween layer on removable fixings.
- Prepare the November products and styling before the season ends.
Make it shoppableUse the transition to introduce your winter or gifting collection.
Avoid thisNatural-looking materials still need cleaning, stable supports and a storage plan.
From inspiration to installation
Make a plan your team can actually build.
Choose one concept, one product story and one owner. Use the shortlist above, then fill in this one-page brief for your team.
Your Halloween window plan
Save a few ideas with the + buttons, then use this plan to choose one.
This planner sends nothing to V-Count. Your shortlist stays in this browser where storage is available. Download or print the plan to keep the notes you enter.
A manageable sequence
Build it this week.
Agree the product story.
Pick one idea, confirm stock and photograph the existing window. Decide how you will compare results.
Build off the shop floor.
Prepare cut-outs, props and product groups before changing the window. Test fixings and lighting.
Check it from the street.
Look from both approaches, in daylight and after dark. Keep products, prices and the entrance clear.
Keep the promise visible.
Replace sold-out display items, tidy props and log any change. Review comparable trading periods.
Attention is the beginning
Did the window bring more people inside?
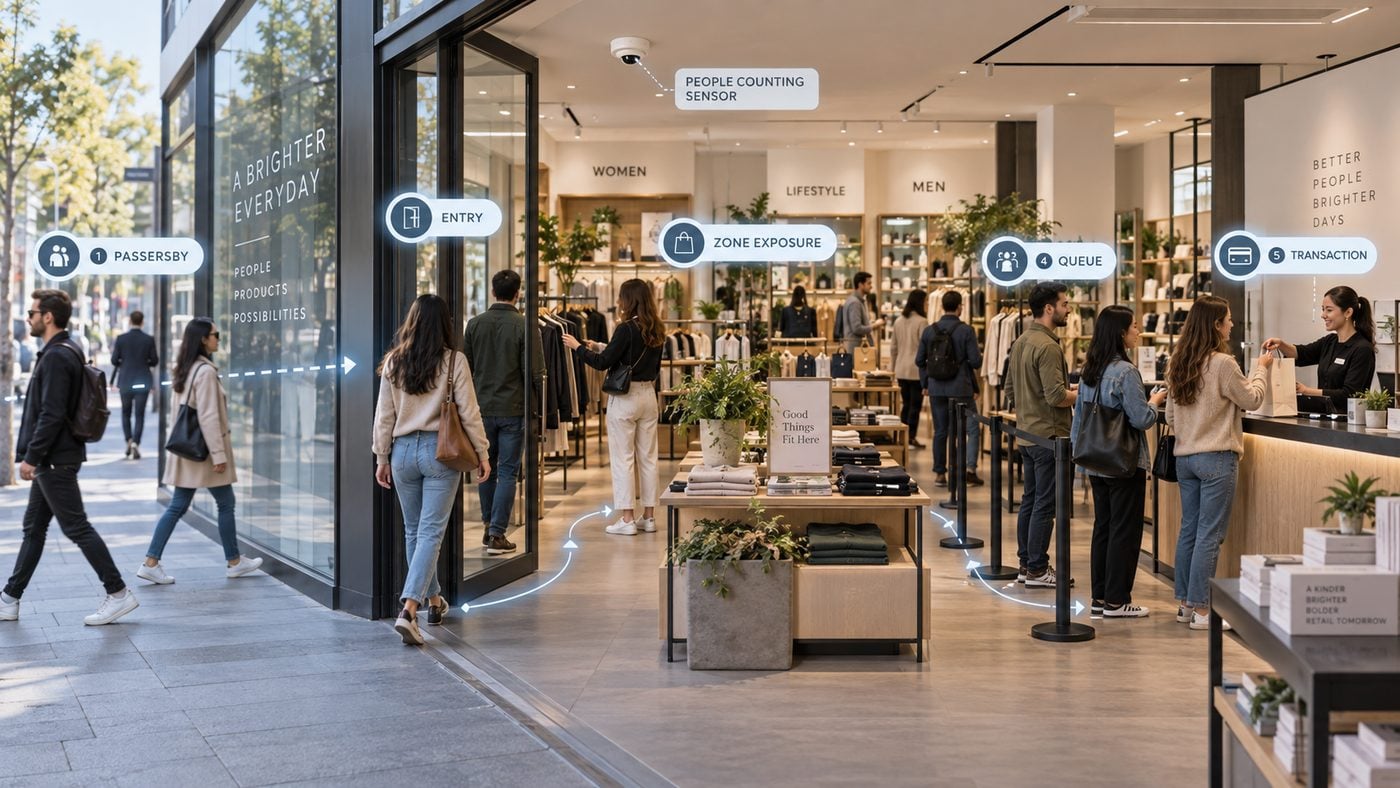
A busier street can make entry numbers rise even when the shop attracts a smaller share of passers-by. Compare the opportunity outside with the visits inside.
Capture rate is store entries divided by measured passing traffic for the same frontage and period. It helps you interpret raw visits in context. Purchase conversion adds what happens after entry, using a consistent transaction and eligible-visit definition.
V-Count’s Analisi vetrina connects this question to passing traffic and entries. The capture-rate guide explains the measurement approach in more detail.
THE OPPORTUNITY OUTSIDE
Capture rate = entries ÷ passers-by × 100THE RESULT AFTER ENTRY
Conversion = transactions ÷ eligible visits × 100Use aligned dates, trading hours, locations and counting definitions.
Compare two display periods
Start with the illustrative example, then enter your own counts. For this example, entry counts also represent eligible visits and staff have been excluded.
Before the change
Display period
Illustrative inputs, not benchmarks or customer results. Counts describe visits rather than identified individuals. Check repeat crossings, staff exclusions and transaction rules. A before-and-after change does not by itself prove that the window caused the result.
01 / Compare fairly
Match trading hours and weekdays. Record weather, local events, product availability, offers and staffing. Do not treat one busy hour as a reliable winner.
02 / Track the featured stock
Use your POS or a simple staff log to review the products shown in the window. Keep engagement, entries and purchases as separate measures.
03 / Learn, then repeat
Keep a dated photograph and the results for each version. A promising display is a candidate for another comparable test, not an automatic rollout decision.
| What you observe | What to check next |
|---|---|
| People stop but rarely enter | Is the offer understandable? Can they see the doorway and the matching product inside? Observe this directly; stop rate is not automatically available from every counting setup. |
| Entries rise but capture falls | The street may simply be busier. Check the passing-traffic denominator and compare the same hours before changing the design. |
| Capture improves but conversion falls | Review stock, product fit, service and queues. The display may attract a broader audience whose needs the store does not yet meet. |
| Featured products sell well | Check margin, availability and other promotions. Preserve the product story and test whether the result repeats. |
Details that make the difference
Six mistakes to catch before customers do.
The props hide the product
Leave the main merchandise clear from the pavement. Remove any decoration that makes the item harder to recognise.
The window looks closed
Dark themes need visible product lighting, a clear doorway and accurate opening information.
The photo spot blocks the entrance
Watch how people actually gather. Move the activity within your permitted space so shopping and accessibility are protected.
The window promises missing stock
Give staff a simple substitution plan. Refresh the display when the featured product is no longer available.
Nobody owns the reset
Assign a daily check for lights, props, glass, product availability and interactive elements.
The design has no November plan
Photograph what worked, pack reusable components together and replace the seasonal layer with your next product story.
Practical answers
Halloween shop-window FAQs
What are the best Halloween window display ideas for a small shop?
Start with a clear product edit, a simple bat frame, a paper skyline or a spotlight on one hero item. These use existing fixtures and leave precious window space for merchandise. Choose an idea that can be understood from the pavement, then make the same products easy to find inside.
How do I decorate a shop window for Halloween on a small budget?
Reuse your plinths, shelves and lights. Spend on one visible element, such as a large paper moon or a few removable silhouettes, and use products you already stock. Agree a total materials allowance before shopping. The low-spend labels in this guide describe relative complexity; they are not supplier quotations.
What can I build at the last minute?
Choose ideas 1, 2, 3, 5, 6, 9, 10 or 45 if you have the fixtures and materials ready. Build the smallest complete version, check it from outside and make sure someone owns daily maintenance. Avoid starting an ambitious suspended or powered installation simply because the calendar is short.
How can a luxury store do Halloween without looking childish?
Use atmosphere and materials: dark velvet, amber glass, a restrained moon shape, precise lighting and generous space. The Jewellery Moon Cabinet, Velvet Night Window and Cabinet of Curiosities keep the products central. A small seasonal detail is often enough.
When should a retailer install and remove its Halloween display in 2026?
Halloween is Saturday 31 October 2026. For a mid-October launch, install as soon as your complete display and featured stock are ready, then check it during the final two weekends. Plan the changeover for 1 November or your next suitable trading window. Retailers selling seasonal stock may reasonably start earlier; the right timing depends on the local market and product range.
Can these ideas work without a traditional display window?
Use a shallow backdrop on an inward-facing wall, a freestanding display within your premises or a small feature on the first merchandising table. Keep the route through the entrance clear. Choose flat graphics, colour edits and product groupings before large scenic props.
How do I know whether my Halloween display is working?
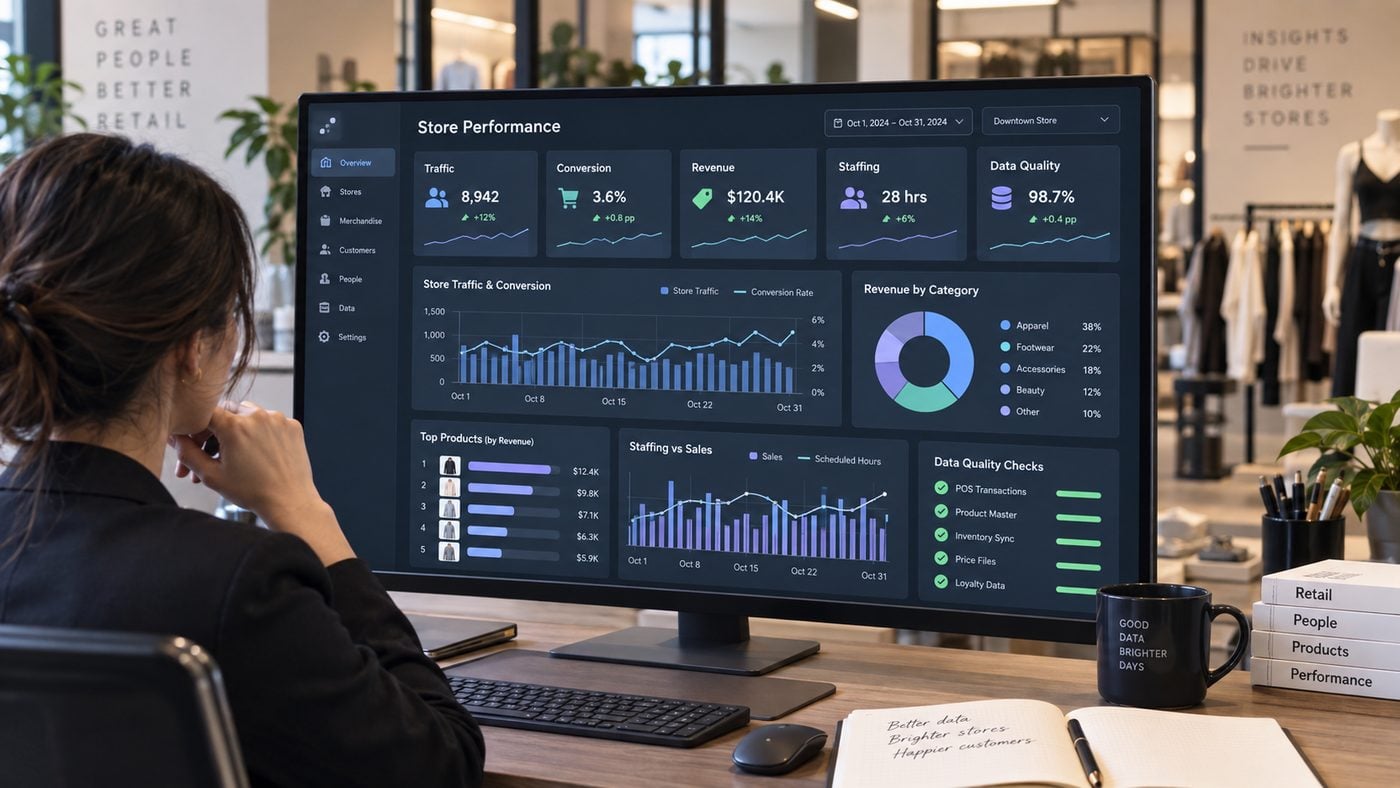
With V-Count, measure entries alongside passing traffic for the same frontage and trading hours: storefront counting records passers-by, Nano AI counts the people who walk in, and BoostBI shows both side by side. Capture rate is entries divided by passers-by, multiplied by 100.
Add transaction conversion and featured-product sales to see what happens after entry. Compare similar days and record other changes; a before-and-after increase alone does not prove the display caused it.
How can I count how many people my Halloween window brings into the store?
Use a people counter at the entrance and count passing traffic at the frontage. V-Count’s Nano AI sensor counts store entries with up to 99% accuracy, V-Count storefront counting measures the passers-by, and BoostBI turns both into a capture rate by hour and day. Connect your POS to see whether the extra visits also bought.
How much does it cost to measure window performance with V-Count?
V-Count sensors cost US$299–US$799 per sensor, paid once, and BoostBI analytics costs US$9–US$49 per sensor per month, depending on the features you select. To plan placement, send a floor plan and a few photos taken by your store manager; V-Count recommends sensor positions within 24 hours.
Are these real store installations?
The images are original AI-generated concept visuals created by V-Count. They illustrate design directions, not documented customer installations or measured results. Adapt dimensions, materials, fixings and lighting to your own shop before building.
About this guide. Original editorial concepts and AI-generated concept visuals created by V-Count. The scenes illustrate design directions, not verified installations, product endorsements or measured performance. Setup times are planning estimates for a prepared team and a single window. Actual materials, labour and installation requirements vary.
Measurement references: V-Count’s storefront counting and capture-rate guide and Analisi vetrina. Research and links checked 17 October 2026. The examples and calculator are illustrative.